

Think about the last time you walked up to a house on Halloween night. Before you saw the porch, before you reached the doorbell, you walked a path. And that path did half the work: a flicker of orange light, a pale hand poking out of the mulch, a creak from somewhere in the bushes. By the time the door opened, you were already inside the story.
That is the quiet power of a good walkway. It is the one part of your Halloween display that every single visitor experiences, in order, one step at a time. It is your opening scene, your trailer, your first impression. And yet most of us pour our time and money into a giant inflatable or a crowded porch, then line the path with two plastic pumpkins and call it done.
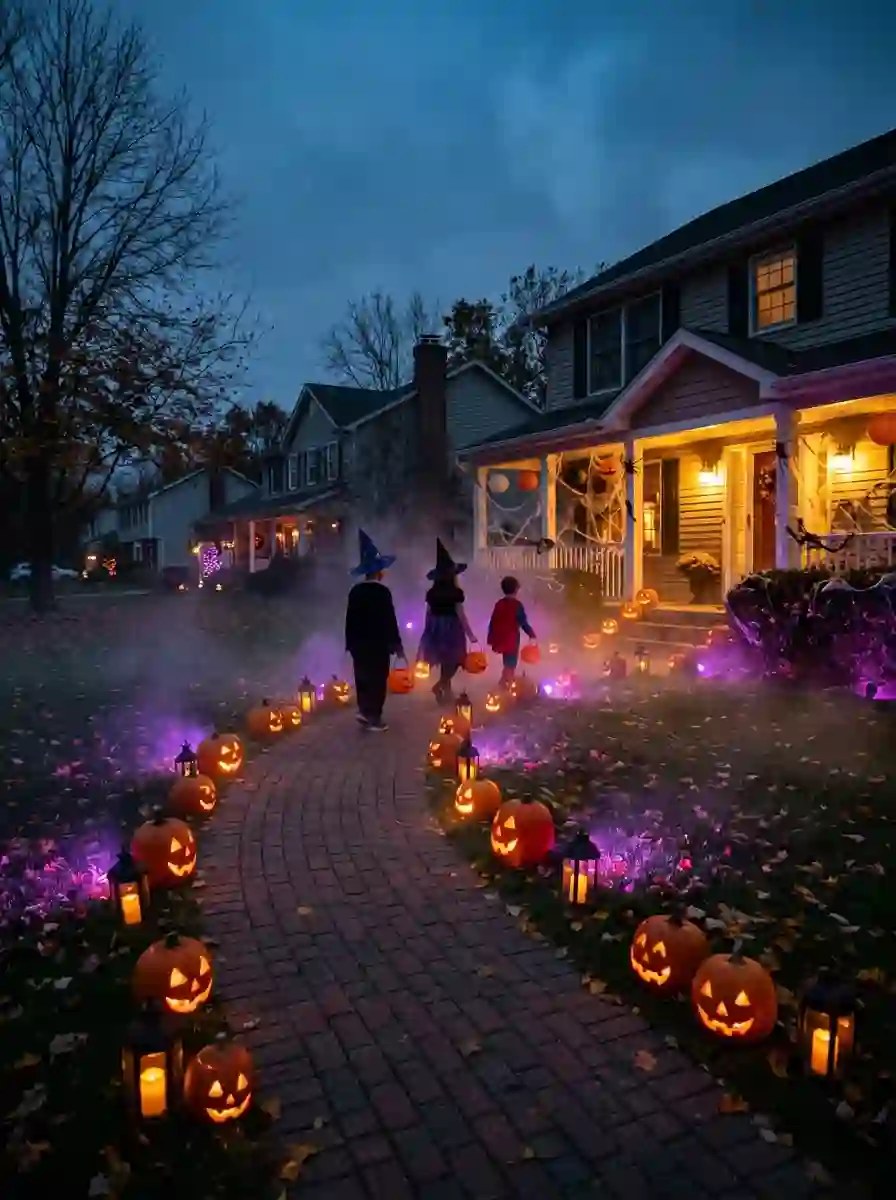
This guide is here to fix that. Below you will find 25 Halloween walkway ideas, from five-minute fixes to weekend builds, plus a lighting blueprint, a safety checklist, budget tips and answers to the questions people ask most. Whether you have a short concrete path to an apartment door, a long curving walk of pavers, or a gravel drive that doubles as your entrance, there is something here that will work for you.
A quick note on how to use it. You do not need all 25 ideas. Skim the headings, pick two or three that suit your space and your comfort level with scares, and layer them. A great Halloween walkway usually has one star feature, a steady lighting plan and a few small details that reward people who look closely. That is it.
Also Read : Balcony Halloween Ideas: 35+ Spooky, Safe, Renter-Friendly Ways to Transform Your Balcony
Before You Decorate: Plan Your Halloween Walkway Like a Pro
The best-looking paths are rarely the ones with the most stuff. They are the ones with a plan. Spend ten minutes on these basics before you buy a single prop and you will save money, time and probably a few stubbed toes.
Walk it in the dark first
Go outside at night and walk your path the way a seven-year-old in a bulky costume mask would. Where does it get dark? Where does the surface change from concrete to grass? Where are the steps, the slope, the sprinkler heads, the tree roots? Mark those spots with a bit of tape or a sticky note. They are the places that need your best lighting and your clearest space.
Keep the walking surface clear
This is the golden rule of every good Halloween walkway: decorate beside the path, not on it. Visitors need a clear, flat strip wide enough for two people, or a parent and a child, to walk side by side. If you have a stroller or wheelchair user in your community, aim for even more room. Props, cords, stakes and hoses all belong on the edges.
Choose one story
A haunted graveyard, a witch’s garden, a friendly ghost parade, a spider’s lair. Pick one idea and let every piece support it. A single clear story looks far more intentional than a mix of unrelated decorations, even if each piece is inexpensive. If you are not sure, start with a colour palette instead: orange and black, purple and green, or all-white ghostly.
Decide how scary you want to be
Your walkway is the first thing small children meet. If your street is full of little ones, keep the scares playful and save the jump-scare for a spot off to the side that nervous kids can skip. If your neighbourhood skews older, you can lean into full horror. Either way, a lit, welcoming approach lets people choose their own adventure.
Know your power situation
Outdoor outlets, extension cords and weather do not always get along. Decide early whether you will use solar lights, battery-powered candles and lanterns, or plugged-in lighting. Battery and solar options are far easier on walkways because there are no cords crossing the path. If you do plug in, use outdoor-rated cords and lights, keep connections off the ground and covered, and tape or tuck cords out of the walking area.
25 Halloween Walkway Ideas to Try This Year
We have grouped these by mood so you can jump straight to what suits your home. Start with lighting, because nothing else matters if people cannot see where they are going.
Lighting-Led Halloween Walkway Ideas
1. Ghost-Face Luminary Bags
This is the budget classic for a reason. Take plain white paper lunch bags, draw ghost faces or bat shapes with a black marker or cut out jagged eyes and a mouth, and drop a battery-powered tea light into each one. Line them along both edges of the path, spaced a few feet apart. The light glows softly through the paper, and because every face is a little different, the whole row has a handmade charm. Kids love helping with this one, and it costs almost nothing. Use battery lights rather than real candles, and weigh the bags down with a spoonful of sand or gravel if your area gets breezy.
2. Flickering Jack-o’-Lantern Rows
Carved pumpkins are still the most recognisable Halloween walkway idea, and they still work beautifully. The trick is how you place them. Instead of a perfectly even line, group pumpkins in clusters of three at different heights, using hay bales, overturned crates or a few bricks to lift some of them. Use flickering LED candles inside so you get that warm movement without the fire risk. Carve a mix of expressions, from grinning to horrified, so your path looks like it is full of watching faces. If you do not want to carve, reusable foam or resin jack-o’-lanterns give the same effect and last for years.
3. Solar Skull Lanterns
If you do not want to deal with batteries or cords, solar-powered skull lanterns or flickering solar lights are an easy win. Push them into the soil along the edge of the path and let the sun do the work during the day. Two honest tips: test them after dark a few days before Halloween, and place them where they actually get sun. Lights tucked under a deep porch or tree shade often fade early in the evening. Pair them with a few battery lights in the shadier stretches so the glow stays even.
4. Purple and Green Uplighting
Orange is the obvious Halloween colour, but a wash of purple or green on nearby trees, shrubs or a fence makes the whole entrance feel otherworldly. Aim a small spotlight upward at a bare tree, a tall shrub or the corner of your house, and keep the light angled away from the walking surface so it is not glaring into anyone’s eyes. Use this as a mood layer on top of your path markers, not a replacement for them. White or warm light on the path itself keeps the footing clear, while coloured light does the storytelling above it.
5. Hanging Lanterns on Shepherd’s Hooks
Want a witchy, fairy-tale look? Push a row of shepherd’s hooks into the ground at the edge of your path and hang lanterns from each one. Battery candle lanterns work well, and so do mason jars with warm LED lights inside. Hanging lights lift the glow to a more comfortable eye level and add height to a low path. Keep the hooks well off the walking surface and tall enough that no one clips a head or shoulder, especially younger kids in pointed hats.
6. A Glowing String Light Canopy
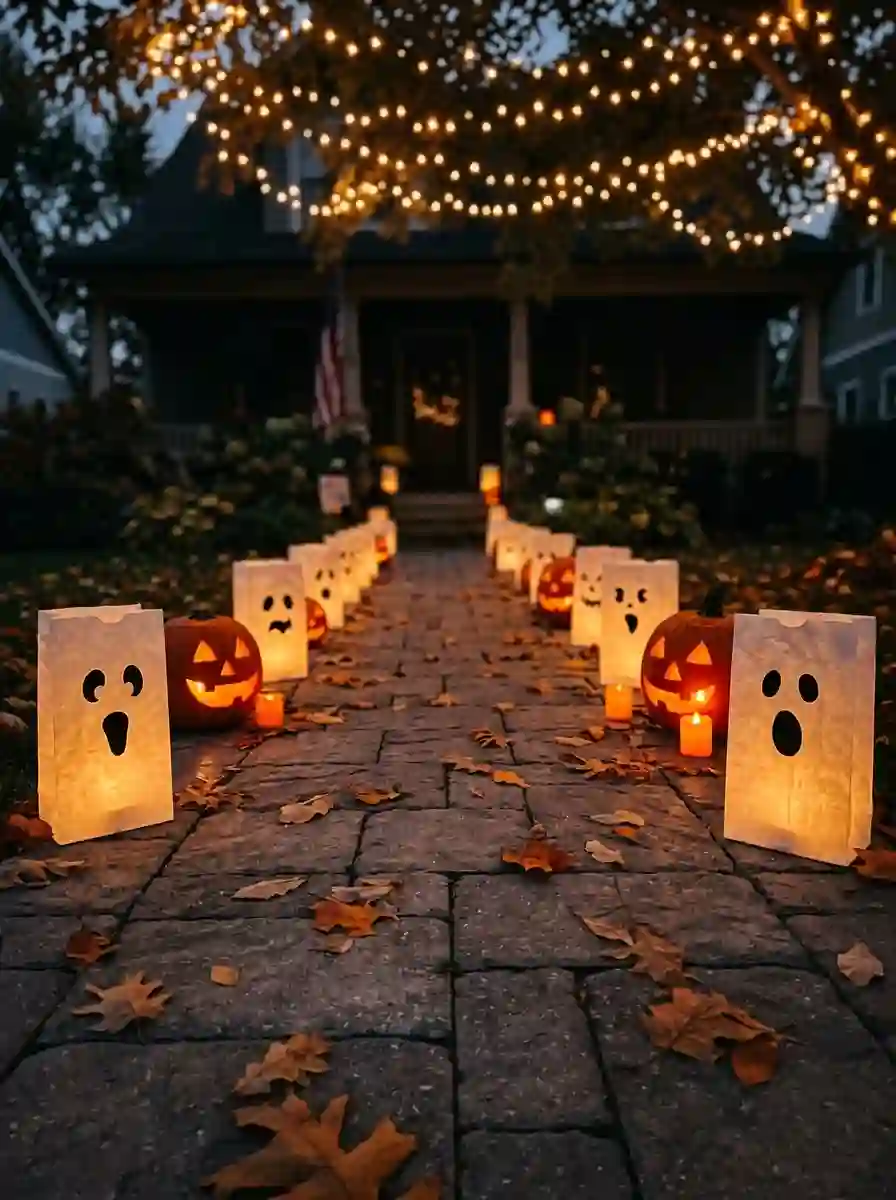
If your path passes under trees, a pergola, an arbor or even a simple row of poles, string lights overhead can turn the whole walk into a tunnel. Warm amber or orange bulbs feel cosy, while purple lights feel more mysterious. Hang the strands high enough to clear the tallest visitor and secure them so they do not sag after a windy night. For a hint of haunt, drape a little black fabric, faux cobwebs or tattered gauze between the lights and let it move in the breeze.
Also Read : Halloween Wall Decor Ideas That Actually Look Good
7. Glow-in-the-Dark Paver Stencils
If your path is made of pavers or flat concrete, temporary decals and chalk-style glow paint can turn the surface itself into part of the display. Think bat silhouettes, spider webs or footprints leading to the door. Use removable decals or washable paint so you do not damage the surface, and test on a small corner first. The effect is subtle in daylight and surprisingly striking at night, especially under a little black light or a purple spotlight. Keep the designs flat and non-slippery, and avoid anything glossy that could get slick in damp weather.
8. Ground Fog and Low Light
Nothing makes a walkway feel haunted like mist curling around your ankles. A small fog machine placed beside the path, or low-lying fog from a chiller, can fill the space between your lights with drifting haze. Use it sparingly and in short bursts. Too much fog hides steps and makes the path harder to see, which defeats the purpose. Pair it with low amber or green lights under the fog, and make sure any steps or edges are still clearly marked. On a calm night, fog pools beautifully along the ground and gives everything a cinematic finish.
Spooky Scene Halloween Walkway Ideas
Once your lighting is set, add the story. These ideas turn the path from a lit walkway into a small scene.
9. The Haunted Graveyard Path
This is the most popular theme for a reason: it works on almost any yard. Place foam or DIY tombstones along both sides of your path, angled slightly as if they have been settling for a hundred years. Add a short iron-look fence, a few dead branches, some faux moss and a sprinkle of dry leaves. Funny epitaphs add personality, and tombstones with your neighbours’ (very) loose inside jokes make people smile on the way in. Keep the graves in the garden beds, not on the path, and use a few uplights to catch the carved lettering.
10. Skeleton Hands Rising from the Mulch
This one is cheap, quick and brilliantly creepy. Push a handful of skeleton hands or arms into the soil and mulch along the edges of the path so they look like they are clawing their way out of the ground. Cluster them in groups of three or four, and mix in a skull or two half-buried for extra drama. Because they sit low, they are easy to keep out of the walkway, and they are a favourite for photos. For an extra jolt, add a hand that reaches toward the path itself, just outside the walking line.
11. A Giant Spider Web Gateway
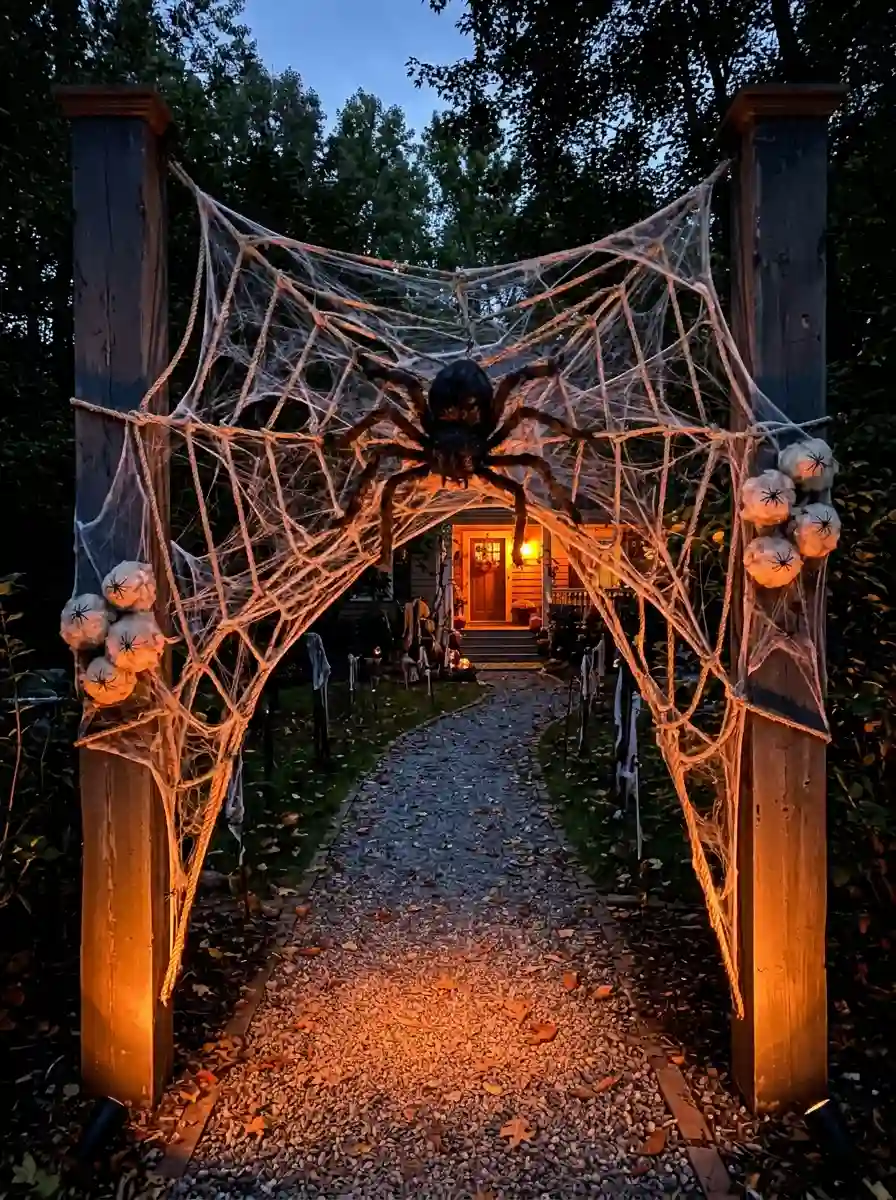
Drape stretchy faux cobwebs over a gate, a pair of poles or the shrubs at the start of your path, then park a giant spider in the middle. The web acts like a threshold, so visitors feel like they are stepping into the lair. Pull the webbing thin and wide for the best effect, and add a few small spiders and egg sacs made of cotton batting to the edges. Keep the webbing high enough that no one walks into it unexpectedly, and avoid hanging it where it could catch on lights or wires.
12. The Crawling Skeleton
Position a skeleton on its hands and knees at the side of the path, as if it is dragging itself toward the door. Add a trail of faux cobwebs, a few torn rags and a single spotlight, and you have a scene that stops people mid-step. It is a good idea for tight spaces because it sits low and takes up very little room. For a bit of humour, give it a candy bucket, a sign that says Almost There, or a tiny pair of sunglasses. Either way, it brings story and movement to a straight, simple path.
13. The Witch’s Potion Path
Turn your walkway into a witch’s garden. Set small cauldrons or black pots along the edges and fill them with glowing LED lights, fog or faux bubbling potion in green. Add glass bottles with hand-lettered labels like Bat Wing, Eye of Newt and Spider Silk, and tuck a broom or two against the fence. Hang a few small potion bottles from shepherd’s hooks and your path becomes a trail of tiny stories. The look is whimsical rather than scary, so it works well for mixed-age crowds.
14. Crows and Black Cat Silhouettes
For a more atmospheric, less gory look, add black crows on posts, fence rails or rooftops, and a few black cat silhouettes with glowing eyes. Cut the cats from black corrugated plastic or thin plywood and add reflective or LED eyes. Crows perched along the path feel like they are watching, and the cats peering from the bushes add a playful touch. It is a great option if you want a classic, vintage Halloween feel without leaning on skeletons and gore.
15. The Dead Forest
Gather fallen branches, bare saplings and a few twisted vines, and plant them in pots or soil along the sides of your path to create a spooky little woodland. Spray them with matte black or grey paint for extra drama, drape a little Spanish moss or gauze across the branches, and add a few perched crows or an owl. Backlit with a soft blue or purple light, the branches throw long shadows that feel almost alive. It is an inexpensive, mostly natural idea, and the look works especially well on a long, curved walk.
16. The Haunted Manor Welcome
Set up a simple wrought-iron style gate, a lantern on a post, and a sign that reads something like Abandon Hope or Welcome, Dear Guests. Add a faux chandelier hanging from a tree, a pair of tattered curtains or a velvet rope, and your path becomes the approach to an old gothic mansion. This idea works best when you keep it simple and commit to a moody, elegant palette of black, deep red and gold. A few dim candle lanterns and a little fog do the rest.
Kid-Friendly Halloween Walkway Ideas
Not every trick-or-treater wants a fright. These ideas keep the magic and dial down the scare, which makes them perfect for streets full of toddlers, preschoolers and nervous first-timers.
17. The Friendly Ghost Parade
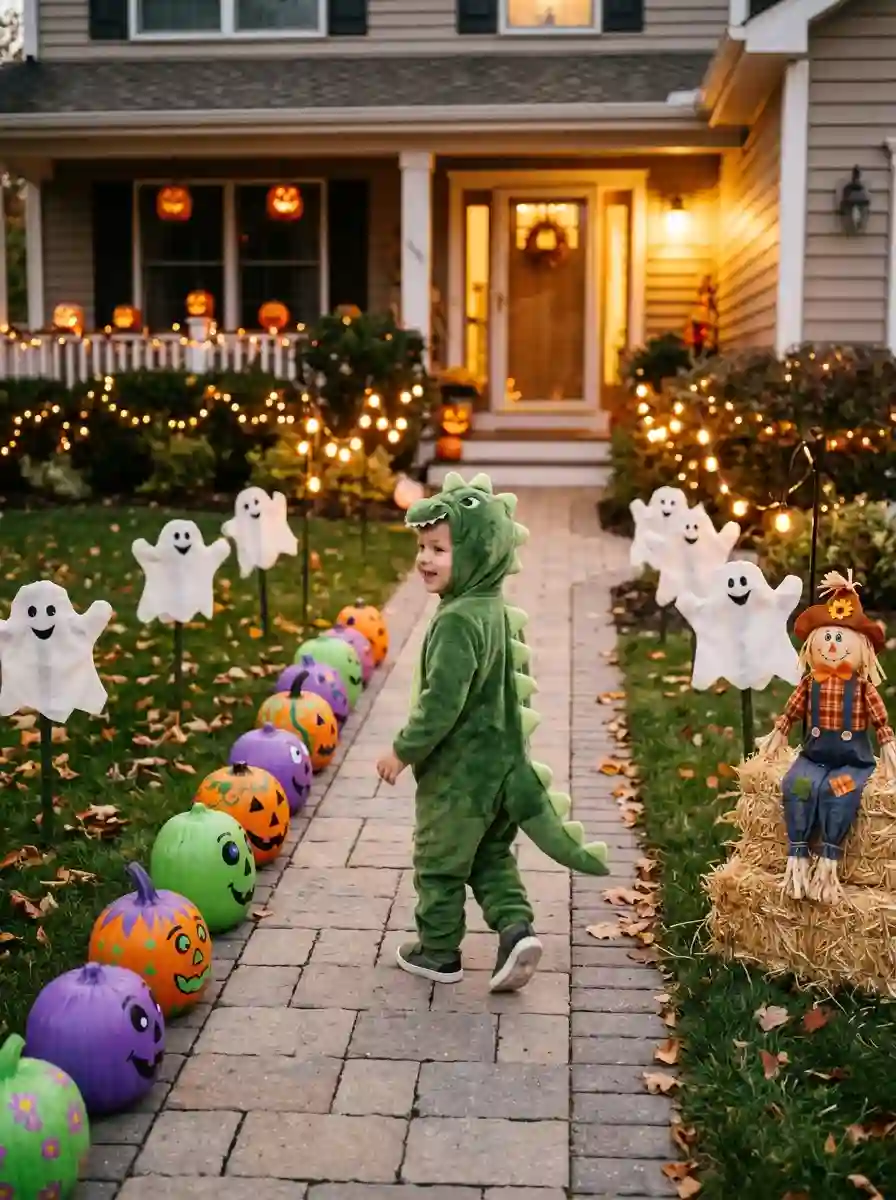
Make a line of ghosts out of white fabric draped over stakes, balloons or old plastic bottles, and set them along the edge of the path so they look like they are marching toward the door. Give each one a different face: sleepy, silly, surprised, shy. A little LED light tucked inside makes them glow softly after dark. Because every ghost is smiling or goofy, small children tend to wave at them instead of hiding behind a parent’s legs. It is also an easy craft project for an afternoon with the kids.
Read Also : Halloween Witch Decor Ideas for a Bewitching Home
18. A Painted Pumpkin Patch Path
Instead of carving, let kids paint pumpkins in bright colours and silly patterns, then arrange them in a cheerful patch along the sides of your path. Add a few hay bales, a scarecrow or two and a hand-painted sign that says Pumpkin Patch This Way. It is warm, welcoming and photo-friendly, and it carries on nicely through the rest of autumn once Halloween is over. For night time, tuck a few battery lights in among the pumpkins so the colours still show.
19. Monster Eyes in the Bushes
This one is cheap, fast and a real crowd pleaser. Cut pairs of eyes from reflective tape, glow-in-the-dark paper or cardboard, and tuck them into shrubs and hedges beside the path. At night, when a flashlight or a porch light catches them, the bushes seem to blink back. Mix big round eyes with narrow cat eyes and tiny clusters of spider eyes for variety. It is spooky in a playful way, and kids love spotting them one by one as they walk up.
20. The Chalk Monster Trail
Grab a box of sidewalk chalk and let your imagination loose. Draw footprints leading to the door, spider webs spreading from the corners, monster mouths on the steps and silly warnings such as Beware of Candy. Chalk washes away with the next rain, so there is no commitment, and it is one of the few ideas that can sit on the walking surface itself. Skip it if your path is steep or slick, and keep designs matte and simple so nobody slips.
Interactive and High-Tech Halloween Walkway Ideas
If you like the idea of your path reacting to visitors, these ideas bring a little theatre.
21. Motion-Activated Sounds
Hide a small weatherproof speaker in a bush or behind a tombstone and connect it to a motion sensor. When someone steps onto the path, they hear a creaking gate, a cackle, a raven or a distant howl. Keep the volume modest, because you want atmosphere, not an alarm, and try to avoid sudden loud bangs near small children. A soft, well-timed sound is often more unsettling than a loud one, and it gives your path a sense of presence even when you are inside getting the candy bowl ready.
22. Projection Magic
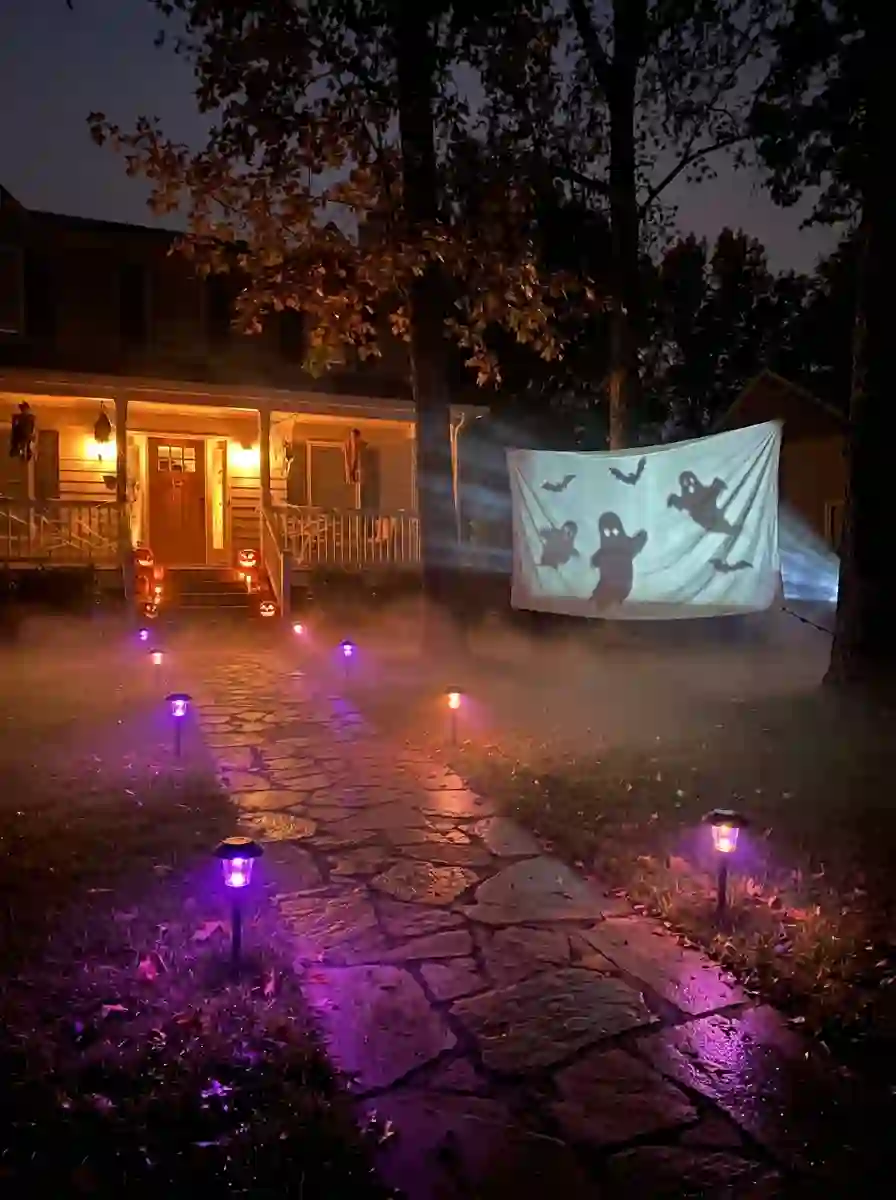
Outdoor projectors have become one of the easiest ways to add movement to a Halloween display. Aim one at a wall, a garage door or a piece of sheer white fabric hung beside the path, and you can have ghosts drifting past, a graveyard coming alive or a witch flying across the moon. For the walkway itself, a small projector can cast moving bats or swirling leaves onto a nearby surface. Use a weatherproof model, protect plug connections from moisture, and place it where it will not shine into anyone’s eyes.
23. The Scare-or-Skip Fork
Here is a clever idea for mixed crowds. Keep the main path calm, lit and welcoming, then build one extra scare zone to the side, such as a pop-up skeleton, a small animatronic, or a creepy corner with fog and sound. Mark it clearly with a sign like Brave Ones This Way. Kids who want a thrill can take a detour, and kids who do not can walk straight to the door. Everyone gets to choose their own adventure, and nobody feels pushed past their comfort zone.
Elegant and Minimalist Halloween Walkway Ideas
Prefer sophisticated to spooky-kitsch? You can still get a standout Halloween walkway with far fewer props.
24. Modern Gothic in Black, White and Gold
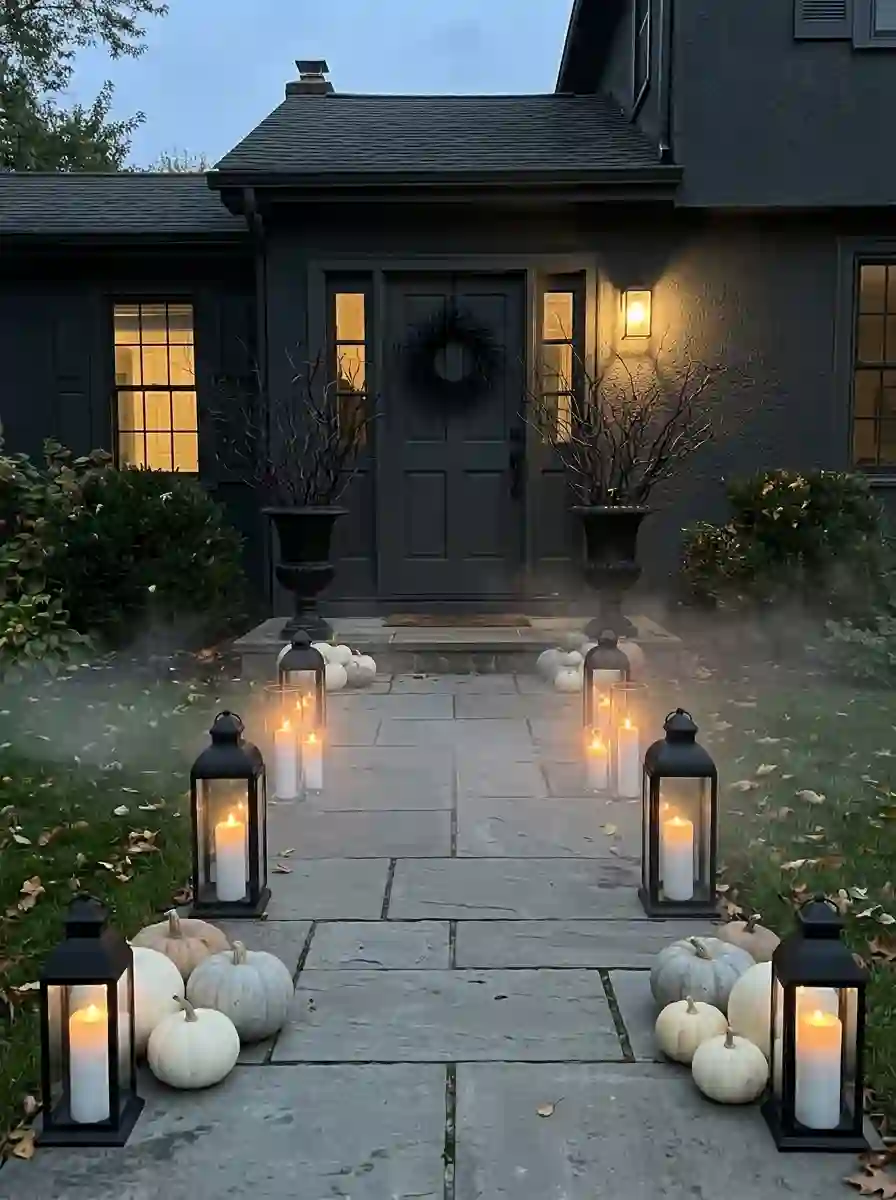
Swap bright orange for a restrained palette. Line the path with black lanterns, white pumpkins and a few tall black candles in glass hurricanes (battery operated, of course). Add dark branches in large urns beside the door and a simple black wreath. Keep the colours limited and the placement deliberate, and the result feels more like an elegant dinner party than a haunted house. Warm white lighting makes everything look rich and moody, and a few pale pumpkins really glow against dark pavers.
25. The Harvest-to-Haunt Path
If you want a display that works for the whole season, build it from natural materials. Corn stalks, hay bales, gourds, heirloom pumpkins, dried grasses and seasonal mums create texture without screaming Halloween. Then add just enough spook: a few black crows, a lantern or two and a faux cobweb on the nearest shrub. When Halloween ends, you can pull the spooky bits and let the harvest look carry through to Thanksgiving. It is low-cost, low-stress and good for the environment, since most of it can be composted.
The Halloween Walkway Lighting Blueprint
Lighting does more than anything else to decide whether your path feels magical or merely cluttered. Think in layers, and you will get a polished result even with simple lights.
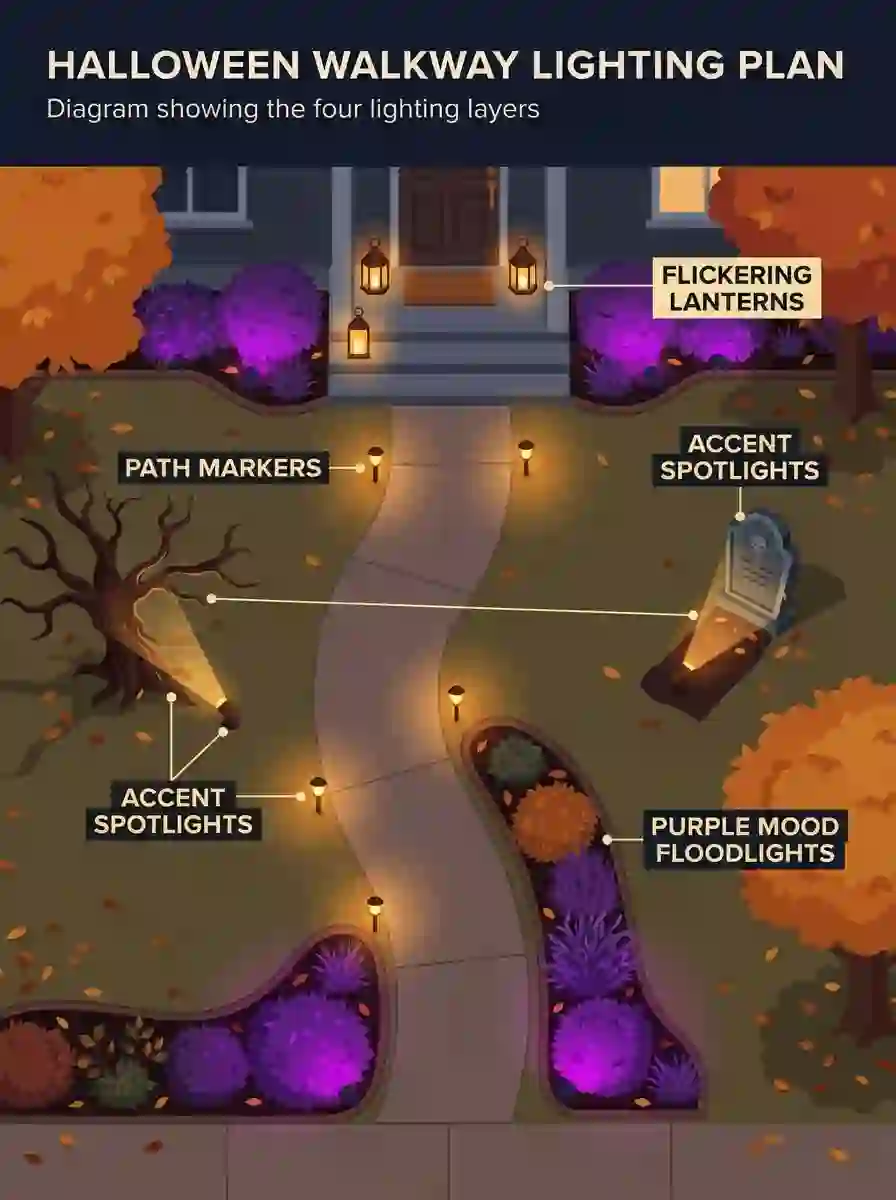
Layer 1: Functional path light
This is the layer that keeps people safe. It should be steady, even and bright enough to show edges, steps and changes in surface. Warm white or soft amber LED stake lights, luminaries and lanterns all work well. Space them close enough that there are no dark gaps, usually every few feet, depending on how bright they are. If you can see a shadowy patch while you are standing at the street, trick-or-treaters will have trouble in it too.
Layer 2: Accent light
This layer highlights the star features: a tombstone, a spider, a tree, a skeleton. Use small spotlights angled upward or across the object, and keep them off the walking surface. A single focused beam looks more dramatic than a flood of general light, and it helps guide the eye to what you want people to notice.
Layer 3: Mood colour
Here you can play. Purple, green, deep blue and red all create very different atmospheres. Use coloured floodlights or bulbs on trees, fences or the side of the house, and keep the colour out of the path itself. Too much coloured light on the ground can hide steps and edges, especially in green or red.
Layer 4: Movement and flicker
Flickering candles, swaying lanterns, drifting fog and projected shadows add life. Even a little movement makes a display feel far less static. Use it sparingly, and always make sure it does not interfere with visibility on the path.
Also Read : Pink Halloween Decor Ideas for a Sweet, Spooky Home
A simple colour guide
Orange feels classic and welcoming. Purple feels magical and slightly witchy. Green feels toxic, eerie and a bit mad-scientist. Blue feels cold and ghostly. White feels clean and safe. Combine one main colour with one accent, such as orange with purple or green with white, and avoid rainbow chaos.
Halloween Walkway Safety Checklist
A great path is only great if everyone gets to the door in one piece. Run through this list before the big night.
- Keep the walking surface completely clear. Props, stakes, cords and hoses belong on the edges, not the path.
- Light every step and change in height. Steps, ramps, curbs and slopes should have extra light or reflective edges.
- Use battery-operated candles, not real flames. Costumes, cobwebs and paper decorations can ignite easily, and fire safety groups generally recommend flameless candles for this reason.
- Secure everything for wind. Tombstones, lanterns and inflatables should be staked, weighted or tied down.
- Tuck away cords. If you must use extension cords, keep them outdoor-rated, off the ground where possible, and well away from the walking line.
- Watch your height. Hanging decorations should clear the head of a tall adult and a kid in a tall hat.
- Think about accessibility. Leave enough width for strollers, wheelchairs and walkers, and avoid anything that creates a bumpy or uneven surface.
- Do a night-time test. Walk the path after dark at least a day before Halloween and fix anything that feels dim, confusing or cluttered.
- Mind the smoke and fog. Use fog sparingly so it does not hide steps, and keep machines away from anything flammable.
- Keep pets in mind. Dogs, cats and wandering wildlife can be startled or tangled by decorations, so check the path for hazards.
Halloween Walkway Ideas for Every Type of Path
Not every home has a long, sweeping path. Here is how to adapt these ideas to the space you actually have.
Short and straight
With only a few steps to work with, pick one strong idea and repeat it. A short row of ghost-face luminaries, two groups of skeleton hands and a single spotlight on a crawling skeleton will make a short path feel deliberate. Resist the urge to fill every inch, because crowding a short path makes it look messy and can block the way.
Long and winding
A long walk gives you room for a story. Break it into scenes, with an entrance (a web or gate), a middle (graveyard or dead forest) and a finale (a lit lantern or small scare at the door). Repeat one element, such as the same lantern or the same glow colour, so it all feels connected.
Gravel or dirt paths
Stake lights, hanging lanterns and solar lights work well here because they push straight into the soil. Avoid glow decals and chalk, which will not hold, and make sure any loose items do not sit in the gravel where they could roll underfoot.
Paved and paver walkways
Pavers are perfect for removable decals, chalk designs and glow-in-the-dark art. Keep lights on the edges and use flat, non-slip decorations only.
Apartment and shared entrances
Check your building’s rules first. Often you can decorate your own door area and the space immediately around it. Use battery lanterns, small luminaries, a wreath and one or two low props, and keep everything out of the shared walkway.
No yard at all
No garden beds? No problem. Use lanterns on the edges of the steps, pots with dead branches at either side of the door and a few small pumpkins on the stairs, as long as they do not narrow the path.
Halloween Walkway Ideas on Any Budget
You can make a stunning path for almost nothing, or spend a little more for a polished look. Here is a rough guide.
Very low budget: Paper bag luminaries, hand-carved or painted pumpkins, chalk art, fabric ghosts, cardboard tombstones and monster eyes from reflective tape. A pack of battery tea lights and a few craft supplies go a long way.
Moderate budget: Solar skull lanterns, foam tombstones, a faux cobweb gateway, a few skeleton hands, shepherd’s hooks with lanterns and a pair of coloured spotlights.
Higher budget: Fog machines, outdoor projectors, motion-activated sound, animatronic props and a full string light canopy.
A smart trick is to spend on lighting first, because good light makes cheap props look great, while poor light makes expensive props look flat. Then add one star prop, and fill in around it with cheap DIY pieces.
Your Halloween Walkway Setup Timeline
Good planning keeps the stress low and the display fresh.
Two weeks before: Pick your theme, measure your path, order anything you need and test your lights.
One week before: Build DIY items, paint pumpkins, make luminaries and check solar lights.
Two or three days before: Set up the main structure, stake down tombstones and props, hang lights and run your night-time test.
Halloween day: Carve fresh pumpkins late in the day so they stay firm, add candles and luminaries, switch on lights and do a last walk through.
The next morning: Bring in anything that is not weatherproof, and check for damage after wind or rain.
If rain is forecast, move paper items under cover, and use plastic, foam or waterproof alternatives for the outer parts of the display.
Common Halloween Walkway Mistakes to Avoid
After all those ideas, here are the traps that catch people most often.
- Overcrowding the path. More is not always better. Leave clear space.
- Using real candles. They are pretty, but they are a genuine fire risk around costumes.
- Ignoring the dark gaps. If any stretch of the path is shadowy, add a light there.
- Mixing too many themes. A graveyard beside a cartoon pumpkin beside a unicorn inflatable can look confused.
- Forgetting where to knock. Make sure the door and the candy bowl are easy to find.
- Skipping the night test. Almost every problem shows up after dark.
- Setting up too early. Paper, pumpkins and fog all suffer when left outside for weeks.
Must Read : Outdoor Halloween Decor Ideas for a Front Yard Everyone Will Talk About
Final Thoughts: Make Your Path Part of the Story
The best Halloween walkway ideas are not about spending the most or having the biggest props. They are about giving every visitor a small moment of wonder on the way to your door. A few good lights, one clear theme and one thing that makes people smile or shiver is all it takes.
Start with safety and lighting, add a star feature that suits your family and your street, and sprinkle in a few details for people to discover. Then stand at the end of your driveway after dark, look up the path and ask yourself one question: would I want to walk up that? If the answer is yes, you are ready.
Happy haunting, and may your candy bowl never run empty.
Frequently Asked Questions
1. What are the best Halloween walkway ideas on a budget?
Paper bag luminaries with battery tea lights, painted or carved pumpkins, sidewalk chalk designs, fabric ghosts and cardboard tombstones are the most affordable options. Most of them can be made with supplies you already have at home, and they look great when grouped in clusters and lit warmly.
2. How do I light a Halloween walkway safely?
Use steady, evenly spaced lights such as LED stake lights, luminaries or lanterns along both edges, and make sure steps and changes in surface are clearly lit. Choose battery or solar lights instead of real candles, and keep cords and stakes away from the walking surface. Always walk the path after dark before the big night.
3. What colour lights are best for a Halloween walkway?
Warm white or soft amber light is best for the path itself because it shows edges and steps clearly. Orange feels classic, purple feels magical and green feels eerie, so use those colours on trees, fences and props rather than the walking surface.
4. How wide should a Halloween walkway be?
Aim to keep at least enough clear width for two people to walk side by side, which is generally around three to four feet, and more if you expect strollers or wheelchair users. Place all decorations at the edges, not in the walking line.
5. Are solar lights good for a Halloween pathway?
Yes, as long as they get enough sun during the day. They are easy to install and have no cords, but they can dim in shade or on cloudy days, so test them after dark a few days before Halloween and back them up with battery lights where needed.
6. How can I make my Halloween walkway spooky but not too scary for kids?
Choose playful themes such as friendly ghosts, painted pumpkins, monster eyes in the bushes or a witch’s potion path. Keep the lighting warm and welcoming, and put any bigger scares in an optional side zone with a clear sign so children can choose to skip it.
7. What can I put on my walkway for Halloween without damaging it?
Removable decals, washable chalk and temporary glow stickers are good options on pavers and concrete. Test a small area first, and avoid permanent paint or adhesives on stone or pavers you want to keep looking clean.
8. How early should I set up my Halloween walkway decorations?
A few days before Halloween is ideal for main props and lighting, while paper items, fresh pumpkins and fog effects are best added on the day. Setting up too early exposes decorations to weather and wear, and it also gives you less time to fix problems.

