

You walk into your kitchen every morning, flick on the kettle, and somewhere between the first yawn and the first sip you notice it again. The cabinet doors look tired. The light feels flat. The counter by the stove has that one stain that no amount of scrubbing will shift. Nothing is actually broken, but the room just doesn’t make you feel good anymore.
If that sounds familiar, you don’t need a wrecking ball. You need a plan.
A full kitchen remodel is slow, expensive and disruptive. You lose your sink for weeks, you eat takeaway off paper plates, and the bill almost always lands higher than the quote. A kitchen refresh is a different animal. It keeps your layout, your cabinet boxes and most of your big-ticket items, and it changes the things your eyes and hands actually notice: colour, light, surfaces, hardware, storage and small details.
Also Read : Kitchen Color Palettes Ideas: 25 Combinations That Actually Work in Real Homes
This guide collects the best kitchen refresh ideas we could find and organises them the way a sensible project manager would. You’ll get 18 ideas with honest notes on cost, effort and payoff, a framework for deciding where to start, the correct order to do the work in (this matters more than people think), renter-friendly alternatives, the mistakes that waste money, and a simple weekend plan you can steal. Let’s get your kitchen feeling like yours again.
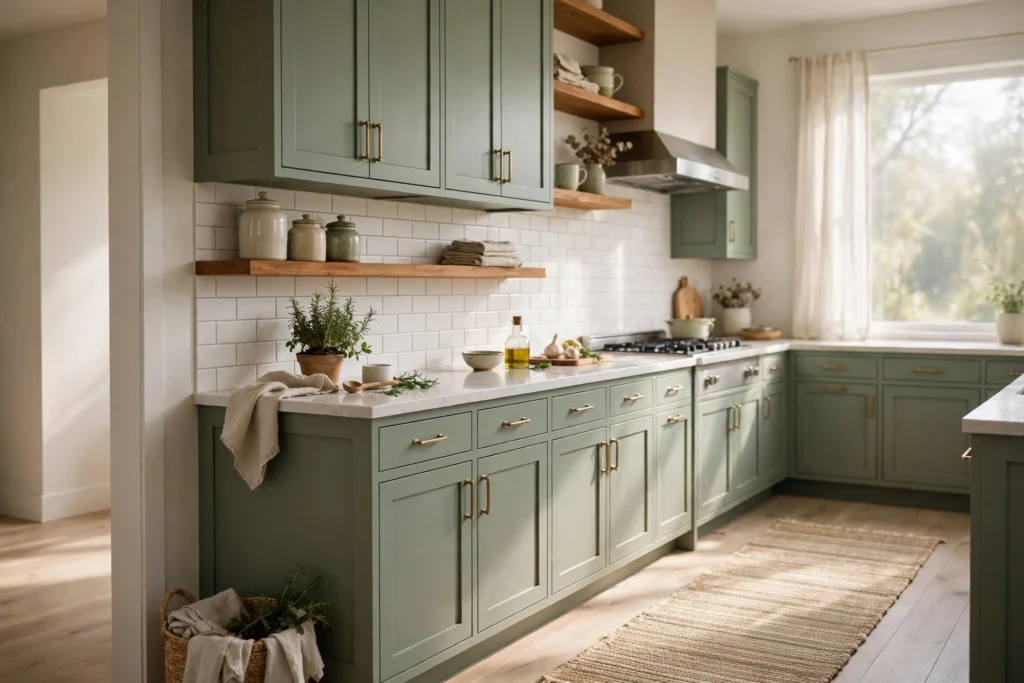
What Is a Kitchen Refresh (and How Is It Different From a Remodel)?
A kitchen refresh is a set of low-to-medium-effort updates that change how your kitchen looks and works without moving walls, plumbing lines or the cabinet layout. Think paint, hardware, lighting, backsplash, small surface upgrades, better organisation and a few well-chosen accessories.
A remodel, by contrast, changes the bones: new cabinets, new layout, new flooring throughout, often new electrical and plumbing. Remodels can be wonderful, but they’re a different budget bracket and a different level of stress.
Here’s a quick way to tell which one you need:
| Question | If yes, think refresh | If yes, think remodel |
|---|---|---|
| Does the layout work for how you cook? | Yes | No, you constantly fight the space |
| Are cabinet boxes solid and doors close properly? | Yes | Swollen, water-damaged or collapsing |
| Is the problem mostly how it looks? | Yes | The problem is how it functions |
| Is your budget under a few thousand dollars? | Yes | You have tens of thousands to invest |
| Do you want it done in days, not months? | Yes | You can live without a kitchen for weeks |
If you’re mostly in the left column, you’re in the right place. A good refresh can change the whole personality of the room for a fraction of what a remodel costs, and it can also make you far more certain about what you’d want from a bigger renovation later.
Before You Start: How to Decide Which Kitchen Refresh Ideas Are Right for You
The fastest way to waste money is to buy a tile sample, fall in love with a pendant light and order a new faucet in the same weekend, all before you’ve worked out what is actually bothering you. Spend twenty minutes on this simple exercise first.
1. Name your three biggest annoyances. Stand in the doorway and be brutally honest. Is it dark? Cluttered? Dated? Sticky? Does the room feel cold? Write down three things. Most kitchens have one or two core problems that drive the whole “I hate this room” feeling.
2. Decide what stays. Anything that is expensive to replace and still in decent shape stays: usually the cabinet boxes, countertops, flooring and major appliances. Plan your refresh around those items rather than fighting them. A beige laminate counter you can’t change is much easier to live with when the cabinets, hardware and lighting are all working with it.
3. Set a number. Be realistic. A sensible rule of thumb is to match your budget to the effort you’re willing to give. Under $100 buys you a deep clean, a couple of cans of paint, hardware and a few plants. Around $300 to $800 gets you a solid cabinet repaint, new lighting and a peel-and-stick backsplash. Between $1,000 and $3,000 opens up refacing, new counters in some materials and a new faucet and sink. Prices vary hugely by country and supplier, so treat these as starting points and get local quotes.
4. Pick a style direction. You don’t need an Instagram-perfect moodboard, just three words. “Warm, calm, natural.” “Bright, fresh, modern.” “Moody, dark, cosy.” Those three words will stop you buying things that fight each other.
5. Choose your effort level. Be honest about whether you want a one-weekend job, a two-week project or something you chip away at monthly. The ideas below are tagged so you can match them to your energy.
The Right Order: How to Sequence Your Kitchen Refresh
This is the part most guides skip, and it’s why people end up repainting a wall they scuffed while installing a light. Work from the top down and from the dirtiest to the cleanest. Here is the order that saves you rework:
- Declutter and deep clean (you can’t judge a kitchen that’s buried in stuff)
- Repairs (loose hinges, chipped paint, dripping taps, cracked caulk)
- Lighting (ceiling, then under-cabinet, then pendants) because wiring work is messy
- Walls and ceiling paint
- Cabinets: repaint, reface or swap doors
- Backsplash and counters
- Hardware, faucet and sink fittings
- Flooring or rugs
- Styling and accessories last, always last
If you remember nothing else from this guide, remember that styling comes last. Accessories are the cherry on top, not the cake.
Must Read: Small Kitchen Organization: 27 Genius Ideas That Will Finally Fix Your Tiny Kitchen
18 Kitchen Refresh Ideas That Genuinely Change the Room
1. Start With a Deep Clean and a Ruthless Declutter
Cost: almost free | Effort: low to medium | Time: one day | Impact: higher than you’d expect
It’s not glamorous, but it’s the best first move you can make, and designers repeat it for a reason. Interior designers interviewed by Homes & Gardens put a big clean and reorganise at the top of their no-spend list, and the logic holds up. A kitchen weighed down by grease film, crowded worktops and expired jars looks older than it is.
Start by emptying one zone at a time: a cabinet, a drawer, the top of the fridge. Wipe everything down. Degrease the cabinet fronts, especially around the hob, where cooking oil quietly builds up and dulls the finish. Scrub the grout. Descale the tap. Clean the extractor filter, which makes the whole room smell fresher.
Then edit. Try the “maybe box” method: anything you’re unsure about goes into a box with a date on it. If you haven’t reached for it in two or three months, donate it. You’ll often find you have three spatulas too many, a graveyard of mismatched lids and an air fryer you swore you’d use.
What’s left should live in a logical place. Keep everyday items between hip and shoulder height, and put the heavy, rarely used appliances low or high. Clear counters are the cheapest luxury finish there is.
2. Repaint the Walls (and Don’t Skip the Prep)
Cost: $30 to $120 | Effort: medium | Time: a weekend | Impact: very high
Paint is the best value-for-money upgrade in any home, and the kitchen is no exception. The trick is picking the right paint and doing the boring bits properly.
Use a washable finish made for kitchens, usually a satin or eggshell, because walls near the cooker get splashed and wiped down constantly. Wash the walls first with a degreasing cleaner, fill dents, caulk gaps and sand lightly. Skipping prep is why a lot of DIY paint jobs look patchy within a year.
Colour choice shapes the whole feel of the room:
- Warm whites and soft creams make small or north-facing kitchens feel kinder and brighter.
- Sage and olive greens are calm, natural and pair beautifully with wood and brass.
- Muted blues and blue-greys work well in sunny kitchens and make white cabinets pop.
- Terracotta and warm clay tones make a cosy, Mediterranean mood, especially with open shelving.
- Deep navy or charcoal can look dramatic, but only if you have decent daylight and good lighting.
Buy sample pots, paint a large swatch on two different walls and watch them for a full day. A colour that looks creamy at noon can turn sulky at 7pm under warm bulbs.
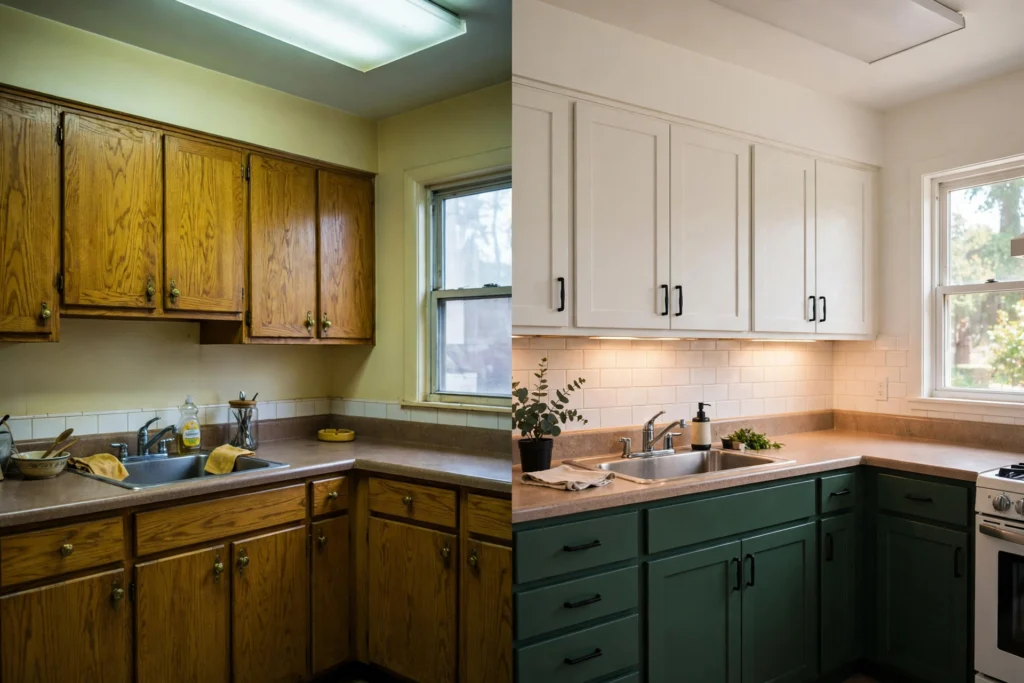
3. Paint Your Kitchen Cabinets
Cost: $100 to $400 (DIY) | Effort: high | Time: 3 to 5 days including drying | Impact: transformational
If your cabinet boxes are sound, painting them is the single biggest visual jump you can make for the money. Ideal Home’s recent piece on a celebrity kitchen makeover makes the same point: when the layout works and the cabinets are structurally fine, a repaint can change the whole look and feel without the cost of replacing everything. It also comes with a fair warning. It needs real prep and is sometimes better left to a professional.
The prep is what separates a durable finish from a peeling disaster:
- Remove the doors, drawer fronts and all hardware. Label everything with masking tape so it goes back where it came from.
- Degrease thoroughly. Cabinets near the cooker are coated in invisible oil.
- Sand lightly to scuff the surface.
- Apply a bonding primer suited to your cabinet material (laminate and melamine need a specific one).
- Paint with a cabinet-grade enamel in two thin coats rather than one thick one, with proper drying time between.
- Let it cure before re-hanging doors. Paint that feels dry can still be soft for days.
A two-tone scheme is a lovely way to ease in. Try darker base cabinets and lighter uppers, or paint only the island in a statement colour. It gives you depth without committing the whole room.
4. Swap the Cabinet Hardware
Cost: $30 to $250 | Effort: low | Time: an hour or two | Impact: surprisingly big
Hardware is jewellery for your kitchen. Changing knobs and pulls costs very little and has an outsized effect on how modern the room looks. Several of the pages we reviewed list this as a core idea, and rightly so.
A few tips that keep it looking considered rather than random:
- Match the finish to your other metals. Brass, black, brushed nickel, chrome and copper can all work, but pick one or at most two and repeat them in the tap, light fittings and a few accessories.
- Measure before you buy. Pulls need to match the hole spacing (centre to centre) unless you’re prepared to fill and re-drill. This single detail ruins more weekends than any other.
- Try the knob-and-pull trick. A designer quoted in a widely syndicated HGTV-style roundup suggests knobs on the upper cabinets and pulls on the lower ones, which is a neat way to add interest.
- Think about touch. Heavy, solid hardware feels better in the hand than hollow, lightweight pieces, and you’ll touch these every day.
If you’re unsure, order one or two samples and hold them against the door before you commit to thirty.
5. Reface the Cabinets or Replace Only the Doors
Cost: $1,000 to $5,000+ depending on size and supplier | Effort: medium to high | Time: days to a couple of weeks | Impact: very high
If your cabinet boxes are in great shape but the doors are dated, damaged or the wrong style entirely, refacing is the middle path between a paint job and a full remodel. Refacing sites and kitchen companies describe it as covering the existing cabinet frames to match new doors and drawer fronts, so you get a new look without tearing everything out.
You have two main routes:
- Replace the doors and drawer fronts with new ones in the style you want (shaker, flat-panel, glass-fronted), then paint or finish them. Many people do this themselves with made-to-measure doors.
- Professional refacing, where a company applies veneer or laminate to the frames and fits new doors. It’s more expensive, but the finish is clean and consistent.
Refacing makes sense when the layout works but you hate the style. It’s a poor choice if the boxes are swollen from water damage or the structure is failing, because you’d be putting a nice coat on a weak foundation.
6. Update the Backsplash (Without Tearing Out the Old One)
Cost: $50 to $800 | Effort: low to high | Time: a few hours to a weekend | Impact: high
The backsplash is the part of the wall that gets seen, splashed and photographed, so it deserves attention. The good news is you have lots of options that don’t involve a tile saw.
- Peel-and-stick tiles are the lowest-effort route. A designer in one syndicated feature recommended self-adhesive penny tile as a “very-budget update”, and the technology has improved a lot. Real estate and home-improvement sources also point to them as a quick, high-end-looking fix without the mess of a full tile job. They’re also ideal for renters.
- Tile paint or tile stickers can rescue a dated but sound ceramic backsplash. Clean well, prime and apply as directed.
- A splashback panel in glass, acrylic or stainless steel gives a seamless, easy-wipe surface. It’s pricier but very hygienic.
- Real tile is the premium option. If you do go this route, classic metro tiles, zellige-style handmade tiles and simple stacked rectangles never really go out of fashion.
Whatever you choose, keep the grout colour in mind. Dark grout hides stains; white grout looks fresher but needs more care.
Also Read : Green Kitchen Ideas: The Ultimate Guide to a Fresh, Unforgettable Heart of the Home
7. Refresh Worn Countertops
Cost: $60 to $3,000+ | Effort: low to high | Time: a day to a week | Impact: high
Countertops are the biggest visual surface in the room, so tired ones drag everything down. Your options depend on your budget and tolerance for DIY:
- Refinishing kits can turn dated laminate into something far more current. A kitchen-focused feature from Chowhound quotes an expert who calls them a way to get chic-looking surfaces without spending a fortune. Results depend on careful prep and realistic expectations, and the finish won’t be as tough as stone.
- Butcher block or wood slabs are a warm, relatively affordable replacement that you can sand and re-oil over the years.
- Counter covers or thin overlay panels hide damaged surfaces at a lower price than full replacement.
- Quartz is a tough, low-maintenance option. One home-and-lifestyle article highlights it as a hygienic choice with antimicrobial agents added during manufacture. It’s an investment but lasts for years.
- DIY tile counters are possible if you’re patient and handy.
If you can’t replace the counters yet, distract the eye. Good lighting, a bold backsplash and neat styling take attention away from a surface you’d rather not look at.
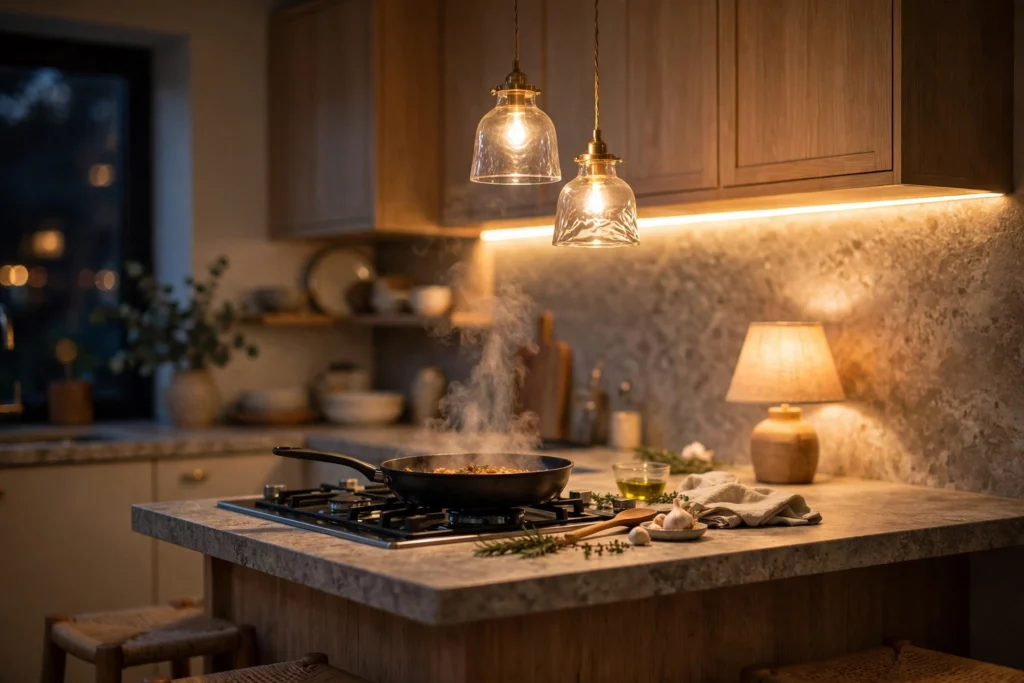
8. Fix the Lighting (This Is the Secret Weapon)
Cost: $20 to $600 | Effort: low to medium | Time: an hour to a weekend | Impact: enormous
A kitchen can have the nicest cabinets in the world and still feel dull under a single harsh ceiling light. Lighting is where a lot of refreshes quietly succeed or fail.
Think in three layers:
- Ambient light from the ceiling for general brightness.
- Task light under the cabinets, so you aren’t chopping in your own shadow. Plug-in or rechargeable LED strips make this easy for renters and DIYers.
- Accent light from pendants over an island, a small lamp on the counter or a glow inside glass-fronted cabinets.
Check your bulbs too. Warm white (around 2700K to 3000K) feels cosy and flattering, while cool white (4000K and above) is sharper and more clinical. Many kitchens do best with warm-to-neutral ambient light and slightly cooler task lighting.
One trick from a designer in a widely shared kitchen roundup: in a dark kitchen, choose translucent or glass shades so the fixtures don’t swallow the light. Good advice.
9. Upgrade the Faucet and Sink Area
Cost: $80 to $500 | Effort: medium | Time: 1 to 3 hours | Impact: high for daily use
You use your tap more than almost anything else in the house, which makes it one of the best places to spend a little. A new faucet instantly makes the sink area look cleaner and more current, and the practical upgrades are real: pull-down sprayers, touchless operation, better water flow and finishes that resist fingerprints.
Sources we reviewed from building-supply and home-industry sites also recommend a more functional sink setup, for example a workstation-style sink with sliding boards, colanders and drying racks, as well as touchless taps for a cleaner kitchen. If a full sink swap isn’t realistic, you can still get most of the benefit from the tap, a good sink grid, a pretty dish brush and a tidy soap setup.
Before you buy, check the number of holes in your sink or counter, the clearance under any window or shelf, and whether your plumbing is standard. If you’re not comfortable with plumbing, this is a fair job to hand to a professional.
And while you’re there, re-caulk around the sink. Fresh, clean white caulk is one of those tiny details that makes a kitchen look cared for.
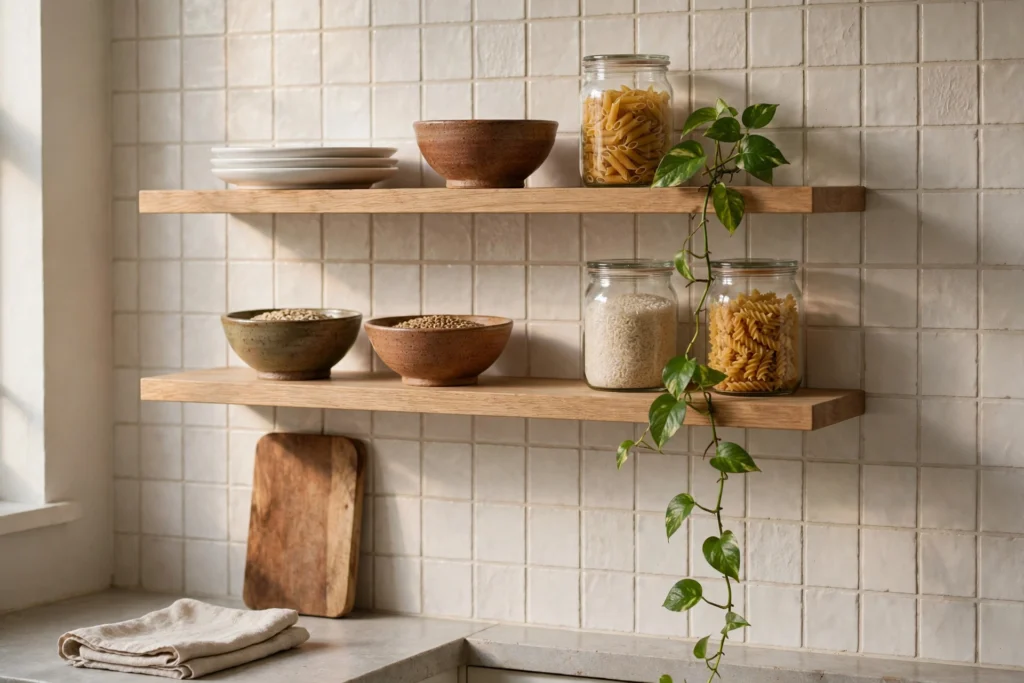
10. Add Open Shelving or Glass-Fronted Cabinets
Cost: $40 to $400 | Effort: medium | Time: an afternoon | Impact: adds personality fast
Open shelving is a favourite refresh because it adds personality, lightens a heavy run of cabinets and gives you somewhere to show off the things you love. Retail and DIY blogs mention floating shelves again and again, and for good reason: they’re cheap, flexible and suit nearly every style from farmhouse to minimalist.
Keep it honest, though. Open shelves show dust and clutter, so they work best when you keep them edited. A few good rules:
- Display things you use daily: plates, bowls, glasses, jars of pasta or grains.
- Mix heights and materials, such as one stack of white plates, a wooden board leaning at an angle, one trailing plant.
- Leave breathing room. A shelf that’s 70% full looks styled; 100% looks cluttered.
- Anchor shelves into studs or use proper wall anchors rated for the weight.
If the idea of exposed dishes makes you twitch, try replacing one or two solid cabinet doors with glass or reeded-glass inserts. You get the lightness without the dusting.
11. Refresh the Floor (or Cover the Worst of It)
Cost: $30 to $3,000 | Effort: low to high | Time: an hour to a week | Impact: medium to high
Flooring is the heaviest, most expensive part of a kitchen to change, so for a refresh the smart play is usually to improve what you have.
- Deep clean and re-grout. Dirty grout can make an entire floor look older than it is. A grout pen or a careful re-grout can work wonders.
- Add a rug or runner. One designer in the widely syndicated roundup suggests a small rug in front of the sink or a long runner down a galley kitchen, and stresses that it should be washable because “sauces fly everywhere.” It’s cheap, it adds colour and it’s kinder on tired feet.
- Use peel-and-stick or click-lock vinyl if the floor is truly past it. Modern vinyl planks and tiles look far better than the old stuff and go down quickly.
- Paint tiles or concrete with a specialist floor paint if you want a pattern on a budget. It needs careful prep and sealing.
When you do replace flooring, think about comfort and cleaning as much as looks. Hard tile is easy to wipe but cold and tough on dropped glasses; wood-look vinyl is warmer underfoot and forgiving.
12. Give the Appliances Some Love
Cost: $10 to $2,000 | Effort: low to high | Time: an hour to a day | Impact: depends on how tired they look
Appliances dominate the visual landscape of a kitchen, so scruffy ones can undo the effect of everything else you’ve done. Before you buy anything, try these steps:
- Deep clean them. Pull the fridge out, vacuum the coils, clean the door seals, descale the kettle and kettle-style machines, scrub hob grates and polish stainless steel with the grain.
- Cover the cosmetic damage. For fridges and dishwashers, appliance panels, decals or specialist paint can freshen the look. A kitchen makeover article we reviewed notes that panels and decals can update appliances without significant expense, though results vary by product, so read reviews.
- Replace the one that bothers you most. You don’t have to swap everything. A new hood, a modern induction hob or a quieter dishwasher can modernise the room. A building-supplies article points out that newer energy- and water-efficient models may also lower running costs over time, so check efficiency ratings before you buy.
- Make finishes match. Mixed black, white and stainless appliances can feel chaotic. If you can’t change them all, repeat the finish somewhere else, such as a stainless shelf or black hardware, so it looks deliberate.
One more underrated chore: replace or scrub your cooker hood filter. A clogged one makes the room feel greasy and stale.
Read Must: Sage Green and Pink Kitchen Ideas: The Ultimate Guide to a Warm, Unforgettable Color Pairing
13. Soften Things With Textiles and Window Treatments
Cost: $20 to $200 | Effort: low | Time: an afternoon | Impact: medium
Hard kitchens full of cabinets, tile and metal can feel echoey and cold. Fabric is the fix. It adds warmth, colour and sound absorption, and it’s the easiest category to swap seasonally.
- Tea towels and oven gloves in a coordinated palette tie the room together for a few dollars.
- Roman blinds or short café curtains soften the window and add pattern. A kitchen designer in one of the roundups chose a patterned Roman shade for a family kitchen.
- Window film can diffuse harsh light and add privacy when you can’t use curtains. A DIY retailer suggests contemporary films as a refresh for kitchen windows.
- Seat cushions on stools or chairs make the kitchen feel like a place to linger rather than just pass through.
Stick to washable fabrics and keep curtains away from the hob.
14. Bring in Plants and Fresh Herbs
Cost: $10 to $80 | Effort: low | Time: an hour | Impact: feels alive
Plants make a kitchen look and feel fresher almost instantly. Several of the guides we read recommend herbs in particular because they’re both pretty and useful, and that’s the right instinct.
Good kitchen candidates:
- Basil, mint, parsley and chives if you have a sunny windowsill.
- Pothos, spider plant and snake plant for lower light and forgiving care.
- Trailing plants on a high shelf or atop cabinets to soften hard lines.
Group pots in odd numbers, use pots that match your hardware or palette and keep trays or saucers under them so your counters stay dry. Don’t have a green thumb? A few high-quality faux stems in a ceramic jug can bridge the gap, but real herbs give you the smell, the flavour and the small satisfaction of snipping something fresh into dinner.
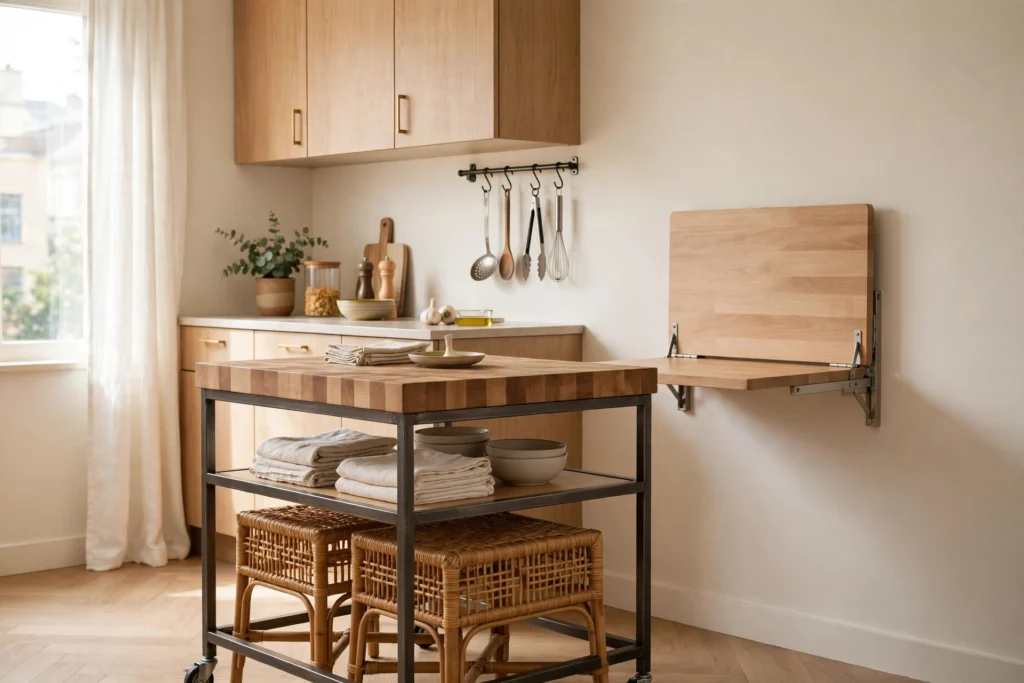
15. Add an Island, Cart or Breakfast Bar
Cost: $80 to $1,500 | Effort: low | Time: an hour | Impact: adds function and focal point
If you have a little floor space, a freestanding island or rolling cart adds worktop, storage and a place for someone to perch with a coffee while you cook. A kitchen makeover guide we reviewed suggests an island for larger rooms and a mobile cart for smaller ones, which is a sensible split.
What to look for:
- Clearance: leave around a metre (about 36 inches) around the island so doors and people can pass.
- Locking wheels if it’s a cart.
- A butcher-block or stone top so it’s genuinely useful for prep.
- Storage underneath, such as shelves or drawers for pans and small appliances.
Add two or three stools in a colour or material that echoes something else in the room and it instantly looks designed. In a very small kitchen, a slim wall-mounted drop-leaf table gives you the same “breakfast bar” benefit and folds away when you don’t need it.
16. Organise Drawers, Cabinets and the Pantry
Cost: $20 to $200 | Effort: low to medium | Time: a day | Impact: changes how the kitchen feels to use
A refresh isn’t only about looks. Some of the most satisfying upgrades are the ones you feel every single day. A DIY retailer notes that even a cutlery tray counts as a kitchen essential, and organisers do transform how smoothly you cook.
Go zone by zone:
- Cutlery and utensil drawers: adjustable trays and dividers end the rummage.
- Pots and pans: deep drawers with pegs, or a vertical rack inside a cabinet, stop the avalanche.
- Spices: a drawer insert, a pull-out rack or a magnetic wall strip keeps them visible.
- Pantry: decant dry goods into matching airtight containers, label them and group like with like. A glass storage jar with a wooden lid gives a calm, clean look and keeps food fresher.
- Under the sink: a two-tier rack plus a small caddy tames the usual chaos.
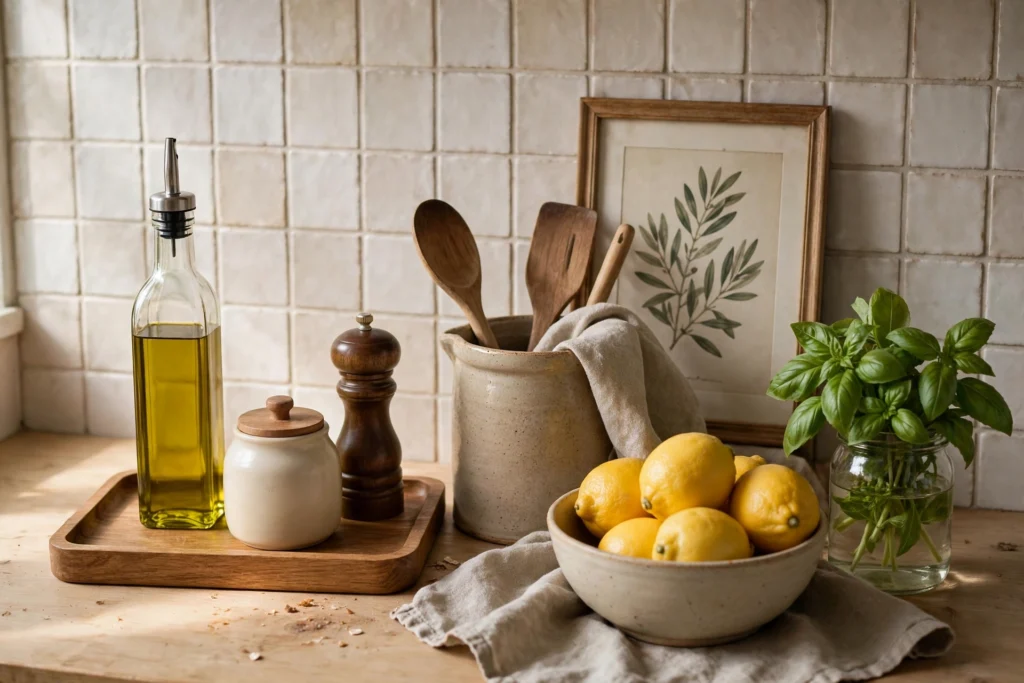
- Wall space: a rail with hooks, a magnetic knife strip and a small shelf for oils clear the counter and keep tools within reach, exactly the sort of fix an expert quoted in a recent kitchen-upgrades article recommends.
Keep your counters to the essentials: a kettle or coffee machine, a chopping board, one small display item. If you can’t remember the last time you used it, it shouldn’t be out.
17. Update the Small Details: Accessories, Art and Colour Pops
Cost: $15 to $150 | Effort: low | Time: an hour | Impact: finishing touch
Now for the fun part. Once everything else is done, bring in the details that make the kitchen yours. One feature we reviewed notes that accessories are a quick, low-risk way to introduce current trends, and that’s the real advantage: you can change them any time without paying a fortune.
- Ceramics and pottery in earthy or handmade styles give a kitchen a personal, collected feel.
- Framed prints or a small gallery wall add colour without using up valuable counter space.
- A tray keeps oils, salt and pepper tidy and looks intentional.
- A good bread bin, fruit bowl or utensil crock is both useful and pretty.
- A statement clock or wall hook can be a small focal point.
- A small rug or runner (see Idea 11) doubles as colour and comfort.
A simple styling rule: follow the rule of three. Group things in threes, vary the height and repeat a colour from somewhere else in the room. If it looks crowded, take one thing away.
18. Make It Smarter and More Hygienic
Cost: $15 to $600 | Effort: low to medium | Time: an hour to a day | Impact: modern and practical
The last idea is about quietly making your kitchen better to live in. Some of the best ones are almost invisible.
- Smart plugs and timers let you control coffee machines, lamps and small appliances from your phone.
- Motion-sensor under-cabinet lighting is lovely when your hands are full of groceries.
- Smart thermostats and smoke or heat alarms add comfort and safety. A DIY retailer’s kitchen guide mentions smart plugs, thermostats and alarms as easy ways to bring a kitchen up to date.
- A touchless tap or soap dispenser keeps raw-chicken hands from touching everything.
- An air-quality upgrade: a clean extractor filter, a window you actually open and a proper cooking-time ventilation habit improve freshness more than any scented candle.
- A better bin with a lid and a sensible recycling split makes the room feel cleaner, and tidier too.
None of it is flashy, but together it makes a room that works a little harder for you every day.
Read Must : Two-Tone Kitchen Cabinets: Getting the Split Right
Kitchen Refresh Ideas by Budget
Not sure what you can do with your money? Here’s a rough guide. Prices vary by country, brand and whether you hire help, so use the ranges as a starting point and get local quotes.
| Budget | What you can realistically do | Best ideas from this list |
|---|---|---|
| Under $100 | Deep clean, declutter, repaint walls, swap hardware, add plants, tea towels, a washable rug | 1, 2, 4, 13, 14, 17 |
| $100 to $500 | Paint cabinets, peel-and-stick backsplash, under-cabinet LEDs, open shelf, organisers, a new tap | 3, 6, 8, 9, 10, 16 |
| $500 to $1,500 | Replace cabinet doors, countertop refinish or butcher block, a rolling island, a new light fitting, refreshed flooring | 5, 7, 8, 11, 15 |
| $1,500 to $3,500+ | Professional refacing, new counters, a new sink and tap, one new appliance, tile backsplash | 5, 7, 9, 12, 6 |
A tip on spending order: If you only have a small budget, put the first dollars into paint, lighting and hardware. They have the best “impact per dollar” of anything on this list. Save the bigger-ticket items for when you can afford to do them properly.
Renter-Friendly Kitchen Refresh Ideas
Don’t own your place? You can still do a lot. Always check your lease first, and keep everything reversible.
- Peel-and-stick backsplash over the existing wall. Peels off cleanly with a bit of gentle heat on most surfaces, though test a small patch.
- Removable wallpaper on a single wall or inside open shelves.
- Swap hardware and keep the originals in a labelled bag so you can put them back when you leave.
- Plug-in or battery under-cabinet lights.
- Freestanding shelves, a rolling cart and a slim storage rack instead of drilling.
- A washable rug to hide tired vinyl or tile.
- Window film or a tension rod café curtain.
- A tabletop or countertop cover that you can lift off at move-out.
- Appliance and pantry organisation, which is entirely yours to take with you.
A good renter’s refresh should survive a move, which means everything you buy should come with you.
Kitchen Refresh Ideas for Small Kitchens
Small kitchens benefit enormously from refreshes because every change shows. A few smart principles:
- Keep colours light and consistent. Painting the walls and cabinets in related tones makes the room feel bigger and calmer.
- Go vertical. Use wall rails, tall shelves and hooks, and keep the counter clear.
- Add reflective surfaces. A glossy backsplash, a mirror, glass-fronted cabinets or a metal finish bounces light around.
- Choose multi-purpose pieces. A rolling cart that doubles as a prep station, or a foldable table you can tuck away.
- Be strict about decluttering. In a small kitchen, every item must earn its spot.
- Light it well. Under-cabinet lighting and good ceiling light make small spaces feel larger.
The best test for a tiny kitchen: if you wouldn’t miss it after a month, it shouldn’t be on the counter.
Popular Kitchen Refresh Styles to Steal
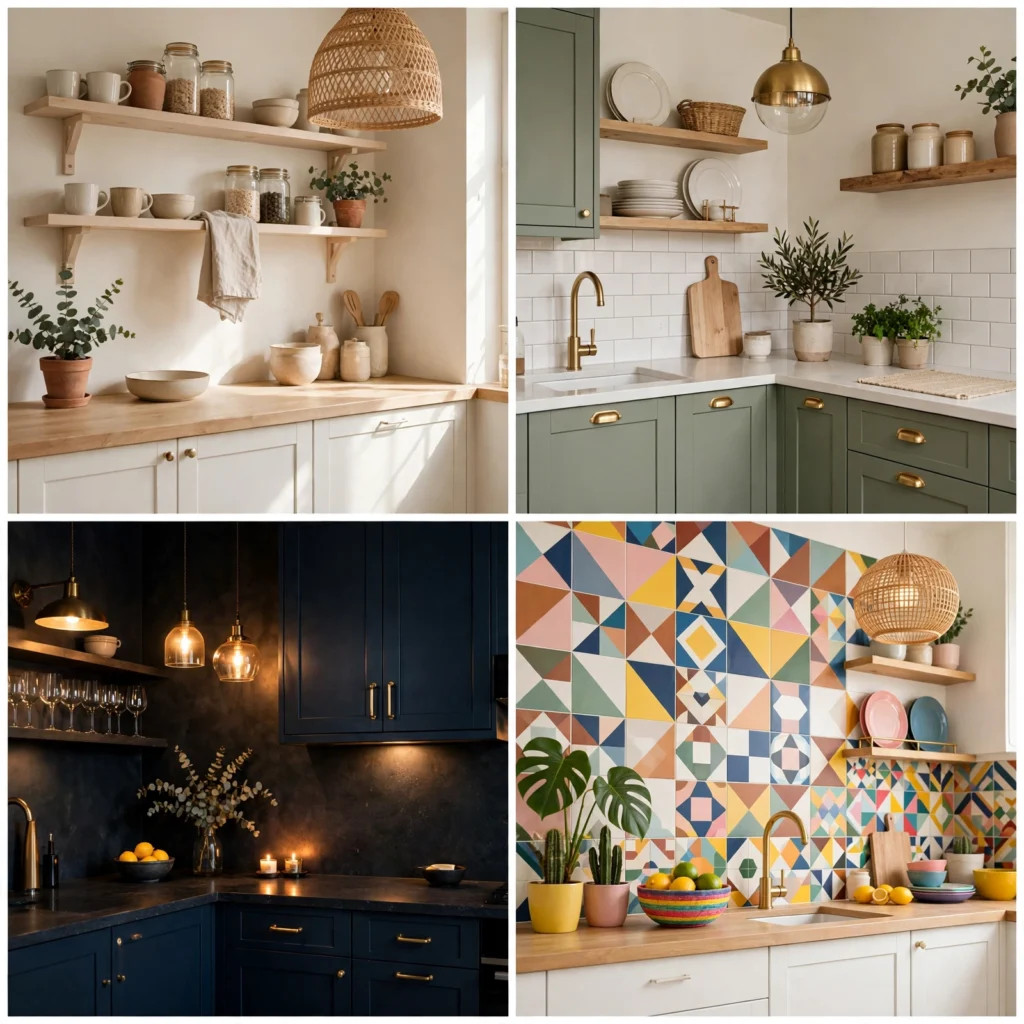
If you’d rather start with a look than a list, these four combinations work well and are easy to build step by step.
Warm Scandi: Soft white walls, pale wood shelves, matte white or light grey cabinets, black or brushed-nickel hardware, glass jars and a handful of green plants.
Modern farmhouse: Cream or sage cabinets, a classic white tile backsplash, brass or black pulls, an apron-style sink, woven stools and a rustic wooden board or two.
Moody and cosy: Deep green or navy cabinets, warm brass hardware, dark grout, plenty of warm light and a generous rug underfoot.
Bright and playful: White walls, a bold backsplash pattern or colourful tiles, a pop of yellow or blue on one cabinet run, and fun accessories.
Pick one, then adapt it to your space, your light and your taste. Rules were made to be bent.
Common Kitchen Refresh Mistakes to Avoid
A bit of foresight saves a lot of money. Watch out for these:
- Skipping prep. Paint on greasy or glossy cabinets peels. Always clean, sand and prime.
- Buying before measuring. Hardware spacing, tap hole counts and shelf depth cause most returns.
- Choosing colours from a screen. Test samples in your actual light, at different times of day.
- Mixing too many finishes. Stick to one or two metals and repeat them.
- Ignoring lighting. A new backsplash under a dim bulb never looks as good as it should.
- Over-styling open shelves. Edit, then edit again.
- Spending on trend pieces first. Fix the foundations before the trendy extras.
- Forgetting how you actually cook. If you chop at the far end of the counter, put the light and the knives there.
- Rushing the drying time. Paint, caulk and adhesive all need real time to cure.
- Not leaving room in the budget. Set aside 10% to 15% for the surprise problem. There is always a surprise problem.
A Simple Weekend Kitchen Refresh Plan
Want a quick win? Here’s a realistic plan that uses the best ideas from this list without burning you out.
Friday evening (1 to 2 hours): Empty the counters, declutter, make your “maybe box” and decide what you’re keeping. Order paint, hardware and any lights you need.
Saturday morning: Deep clean everything: cabinets, walls, appliances, sink, hood filter. Do minor repairs and re-caulk.
Saturday afternoon: Paint the walls. While they dry, remove cabinet doors if you plan to paint them next.
Sunday morning: Fit new hardware and under-cabinet lights, and apply a peel-and-stick backsplash if you’ve chosen one.
Sunday afternoon: Organise drawers and pantry, put down the rug, set up plants and finish with a little styling.
If you’re repainting cabinets, add three to five days to allow for prep and curing. It’s worth it.
Also Read: The Farmhouse Kitchen, Minus the Theme-Park Version
Is a Kitchen Refresh Worth It Before Selling?
If you’re planning to sell, a refresh is often a smart move. One real estate source we reviewed notes that sellers usually recover only about half to somewhat over half of what they spend on a full kitchen remodel, which is why many agents suggest cosmetic updates instead. Fresh paint, new hardware, better lighting and a tidy, uncluttered room make a kitchen feel clean, bright and move-in ready, and they cost far less than a gut renovation. Local markets differ, so ask a trusted agent what buyers in your area expect.
Final Thoughts
A kitchen refresh doesn’t have to be a giant project with a giant price tag. Some of the most effective kitchen refresh ideas are small: a deep clean, a new coat of paint, better light, cabinet hardware that feels good in the hand. Put those foundations in place, then layer on shelves, plants, textiles and the little touches that make the room feel like home.
Work in the right order, spend where it matters, protect yourself against the usual mistakes and be patient with the curing and drying. In a weekend or two, you can walk into the same kitchen and feel like it’s a different room.
So pick one of these kitchen refresh ideas, the one that annoys you most, and do that today. The rest will follow.
Frequently Asked Questions About Kitchen Refresh Ideas
1. What is the cheapest way to refresh a kitchen?
A deep clean and declutter cost almost nothing and make a bigger difference than most people expect. After that, the best-value upgrades are a fresh coat of paint, new cabinet hardware and a few plants or herbs. You can do all of that for under $100 in many places.
2. How can I refresh my kitchen without renovating?
Focus on surface changes: paint the walls or cabinets, replace hardware, add under-cabinet lighting, install a peel-and-stick backsplash, add a rug and reorganise your storage. None of these needs structural work, plumbing changes or new cabinets.
3. How much does a kitchen refresh cost?
It depends on your goals and where you live. A light refresh with paint, hardware and accessories can cost under $200. A mid-level refresh with painted cabinets, a new backsplash and lighting often lands between $300 and $1,500. Refacing new counters and a new sink can push the total to several thousand dollars. Always get local quotes for bigger jobs.
4. Is painting kitchen cabinets a good idea?
Yes, if the cabinet boxes are sound and the doors are in decent shape. It’s one of the most cost-effective ways to change the look of a kitchen. The key is thorough cleaning, sanding, proper primer and a durable cabinet-grade paint. If the cabinets are water-damaged or falling apart, replacing or refacing them is better.
5. What is the difference between a kitchen refresh and a kitchen remodel?
A refresh updates the surface: paint, hardware, lighting, backsplash, accessories and organisation, while keeping your layout and main fixtures. A remodel changes the structure: new cabinets, layout, flooring, plumbing and electrical work. A refresh is faster, cheaper and less disruptive.
6. What should I do first when refreshing a kitchen?
Declutter and deep clean first, then fix small repairs, then tackle lighting, walls, cabinets, backsplash and counters, then hardware, and finish with accessories. Working in this order avoids damaging new work as you go.
7. What colours are best for a kitchen refresh?
Warm whites, soft greens, muted blues and earthy neutrals are reliable choices that suit most kitchens. Deep navy or charcoal can look striking in a bright, well-lit space. Whatever you choose, test samples in your own light and make sure the colour works with your counters, floor and appliances.
8. Can renters refresh their kitchen?
Absolutely. Peel-and-stick backsplashes, removable wallpaper, plug-in lighting, swapped hardware (keep the originals), washable rugs, window film and freestanding storage can all be removed when you move out. Check your lease and test any adhesive on a small hidden area first.
9. How long does a kitchen refresh take?
A basic refresh can be done in a weekend. If you’re painting cabinets, plan for a week or so because of prep, painting and curing time. Refacing or replacing doors usually takes several days to a couple of weeks, depending on whether you do it yourself or hire a professional.
10. Does a kitchen refresh add value to a home?
Often, yes, in terms of appeal. A fresh, clean, well-lit kitchen makes a strong first impression on buyers, and cosmetic updates generally cost much less than a full remodel. The exact return depends on your local market, the condition of the rest of the house and the quality of the work, so it’s worth asking a local agent before you spend.