

A blank wall, fence or balcony rail can hold more plants than a whole row of floor pots, provided you start with the right size. Begin with one panel about 90cm wide and 120cm high, rather than covering an entire wall at once. Leave at least a 5cm gap between the structure and the wall so air can move behind it and damp cannot sit against the surface.
Budget is the next decision. A small first wall made from railing planters, a leaning ladder or a fabric pocket planter usually costs £60–£180, including plants and compost. A larger felt or modular living wall, with its own watering system, more often costs £400–£1,200, depending on size and plant choice.
Allow a weekend for a railing, pocket or ladder wall, and two to four weeks for a planted pallet or trellis wall to settle. A living wall needs longer still: four to six weeks before the plants root through their pockets and the wall starts to look full, rather than newly planted.
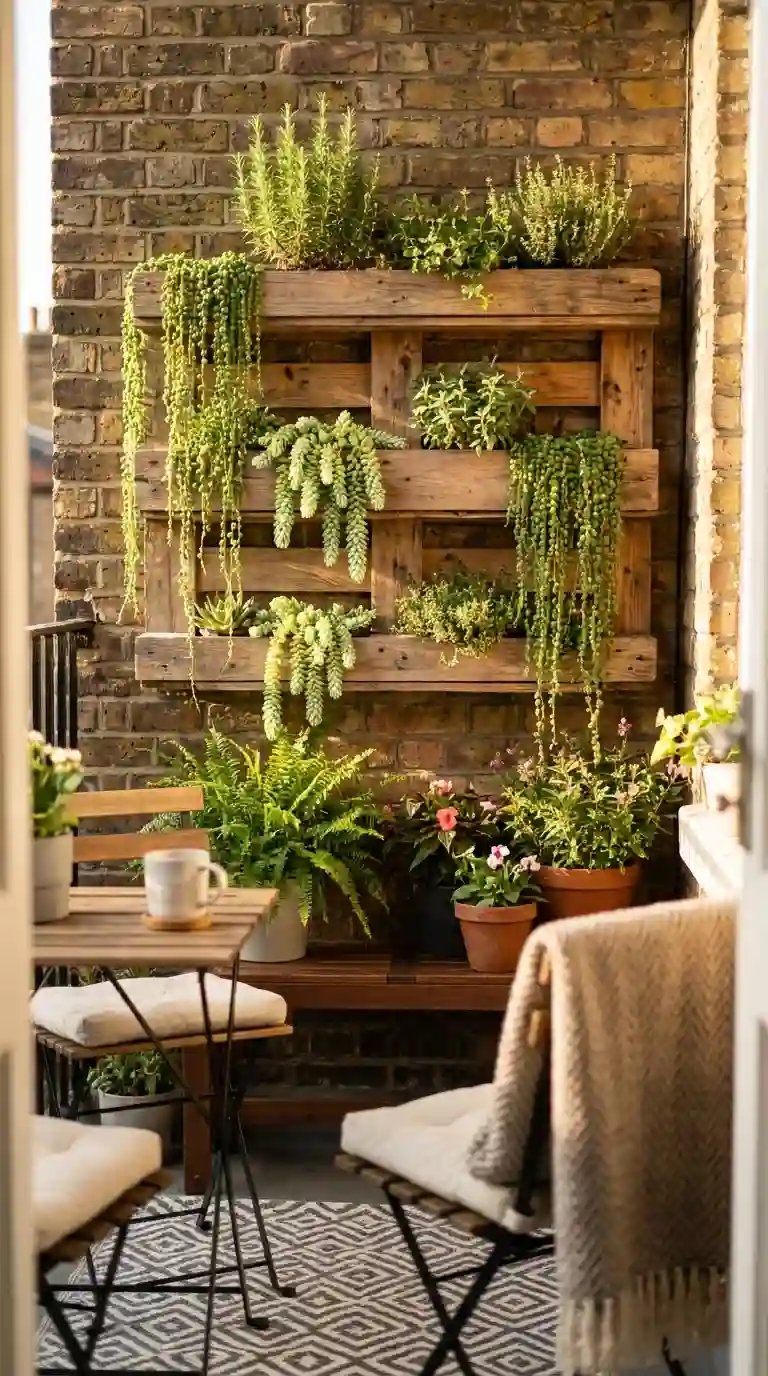
Where Should You Start With a Bare Wall?
Choose the wall you actually walk past every day, not the most photogenic corner. Check the light there in the morning, at midday and in late afternoon: a wall that looks bright at noon can be in deep shade by three o’clock, and that difference decides which plants will survive. The brick wall in the photo above works because the planting sits where light reaches it, rather than filling every centimetre of wall for effect.
Decide the fixing before you buy a single plant. If you rent, or the wall is plasterboard, choose a freestanding shelf, a leaning ladder or a tension system that does not need drilling. For a mounted wall, check the fixings against the real weight: a medium pallet garden, fully watered, can weigh more than 45kg, so use fixings rated for at least double the weight you expect.
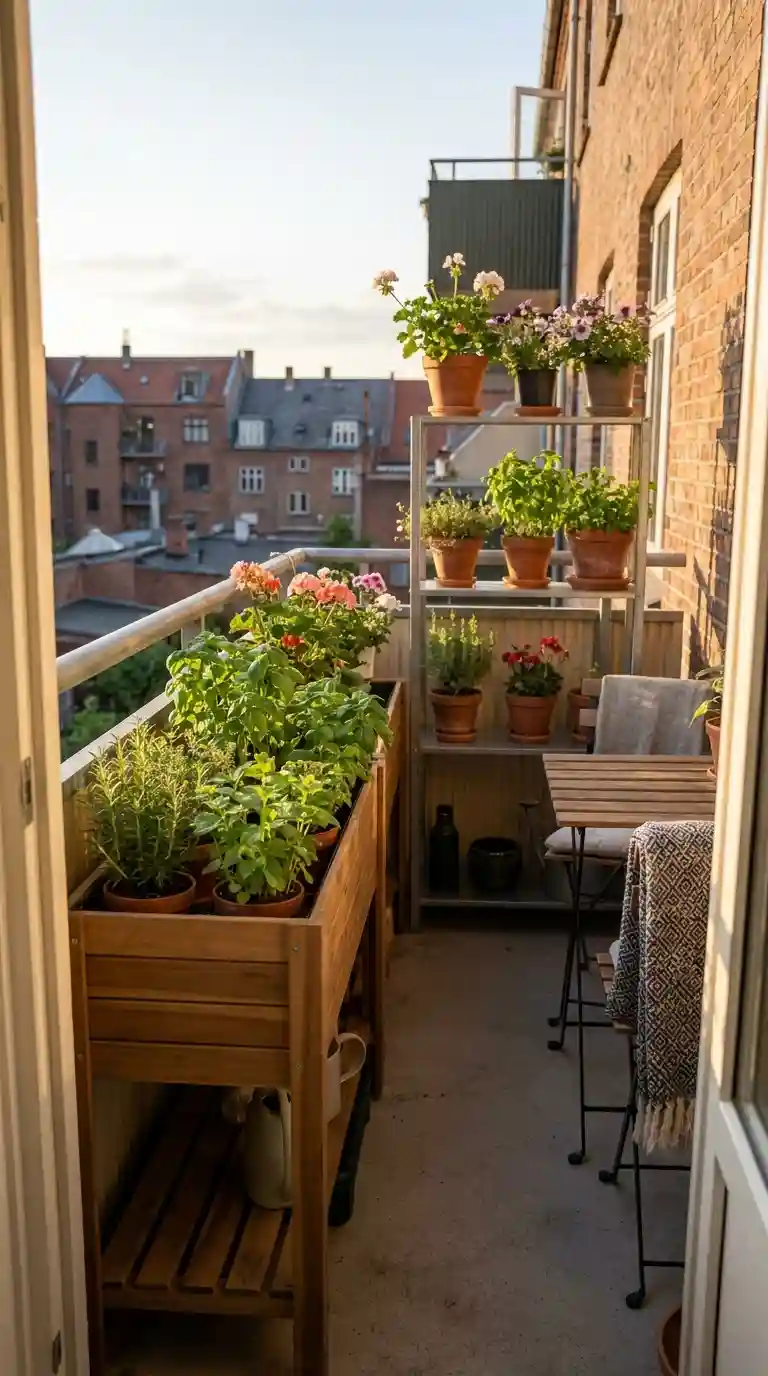
How Do You Make a Small Balcony Work?
On a balcony, use the rail and the wall before you use the floor. Railing planters clip on without taking a single square centimetre of floor space, and a trellis fixed to the wall can carry jasmine, morning glory or cucumbers upwards within one season. A leaning ladder is the most forgiving first step: each rung holds a pot, nothing needs drilling, and the whole arrangement can be moved when the wind changes direction.
Check the wind before you plant. On an exposed balcony, choose heavier pots, secure every clip, and keep tall, top-heavy plants low until they are established. The same care applies to the wall itself: for ideas on dressing an outdoor wall for everyday use, see how a patio wall is dressed for outdoor living, which keeps the planting and the seating working together rather than competing.
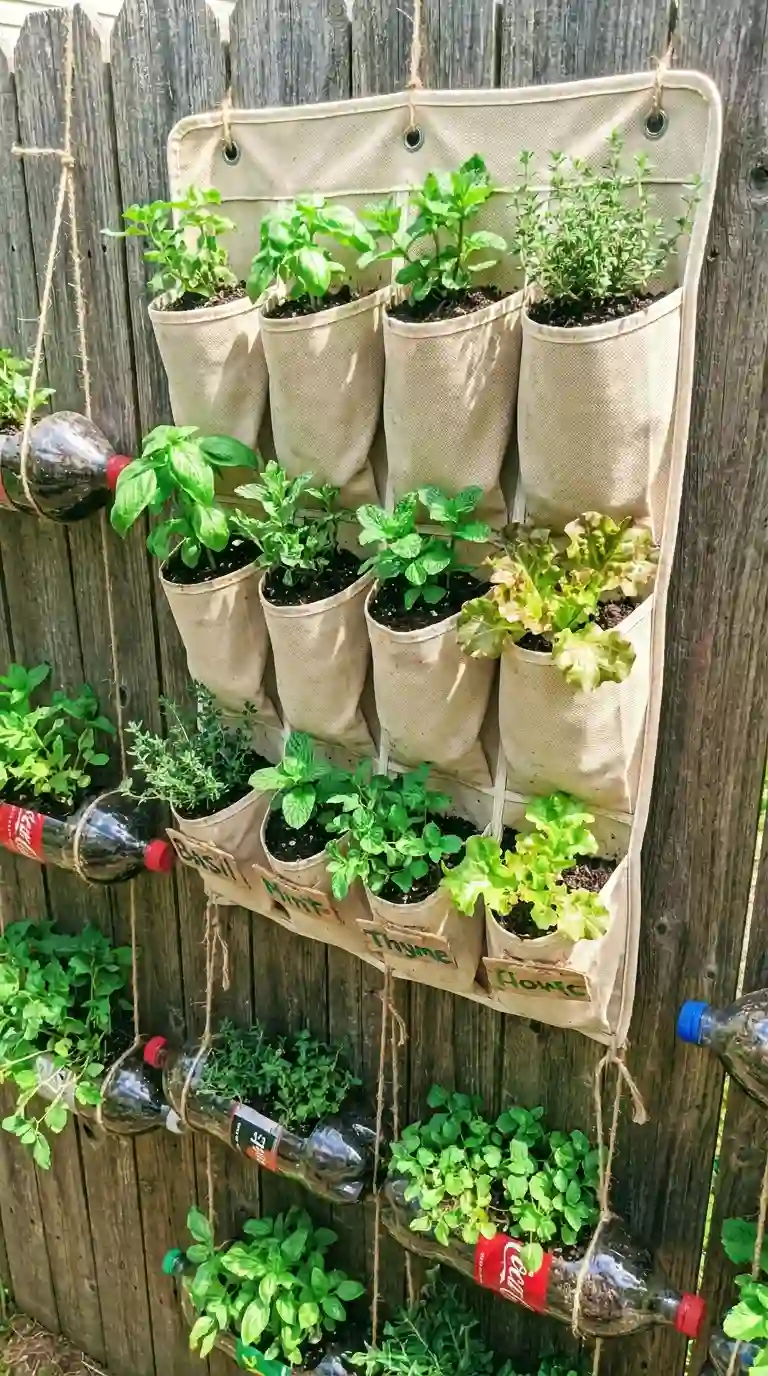
Can Recycled Materials Really Hold Up?
Yes, if you treat drainage and weight as part of the build, not an afterthought. A wooden pallet works because its slats already form pockets: line the back and bottom with landscape fabric, let it lie flat for one to two weeks so roots settle, and only then stand it upright. Plastic bottles need two or three drainage holes each, and a fabric shoe organiser works best for shallow-rooted crops such as lettuce, spinach and strawberries.
The cheap option fails when it is overloaded. Limit a pallet wall to small plants, keep the soil mix light with perlite or coco coir, and add a drip tray or a 5cm gap behind the structure. That single gap, plus holes in every container, is what stops a recycled wall from staining the surface behind it.
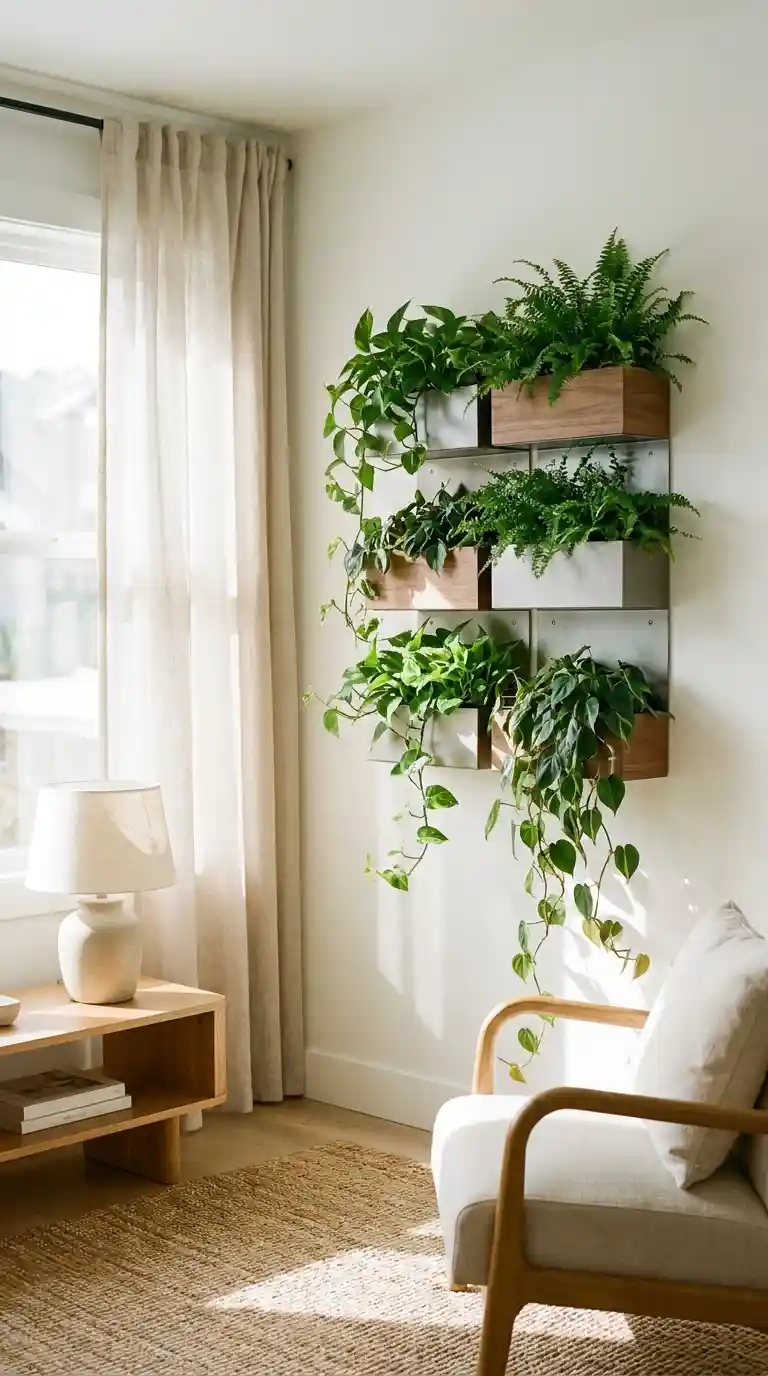
What Works Indoors Without Damaging the Wall?
Indoors, start with furniture rather than fixings. A tall, freestanding shelving unit packed with plants can divide an open-plan room, while floating shelves with trailing pothos or philodendron give height without a single drilled hole. Macrame hangers at staggered heights work well near a bright window, provided each hanger is hung from a hook rated for the wet weight of its pot.
Protect the wall behind any indoor planting. Keep pots at least 5cm away from the surface, wipe up splashes promptly, and put a tray under every container that will be watered in place. The same no-drill thinking applies beyond plants: for guidance on dressing rented walls in general, see how rented walls are dressed without losing a deposit.
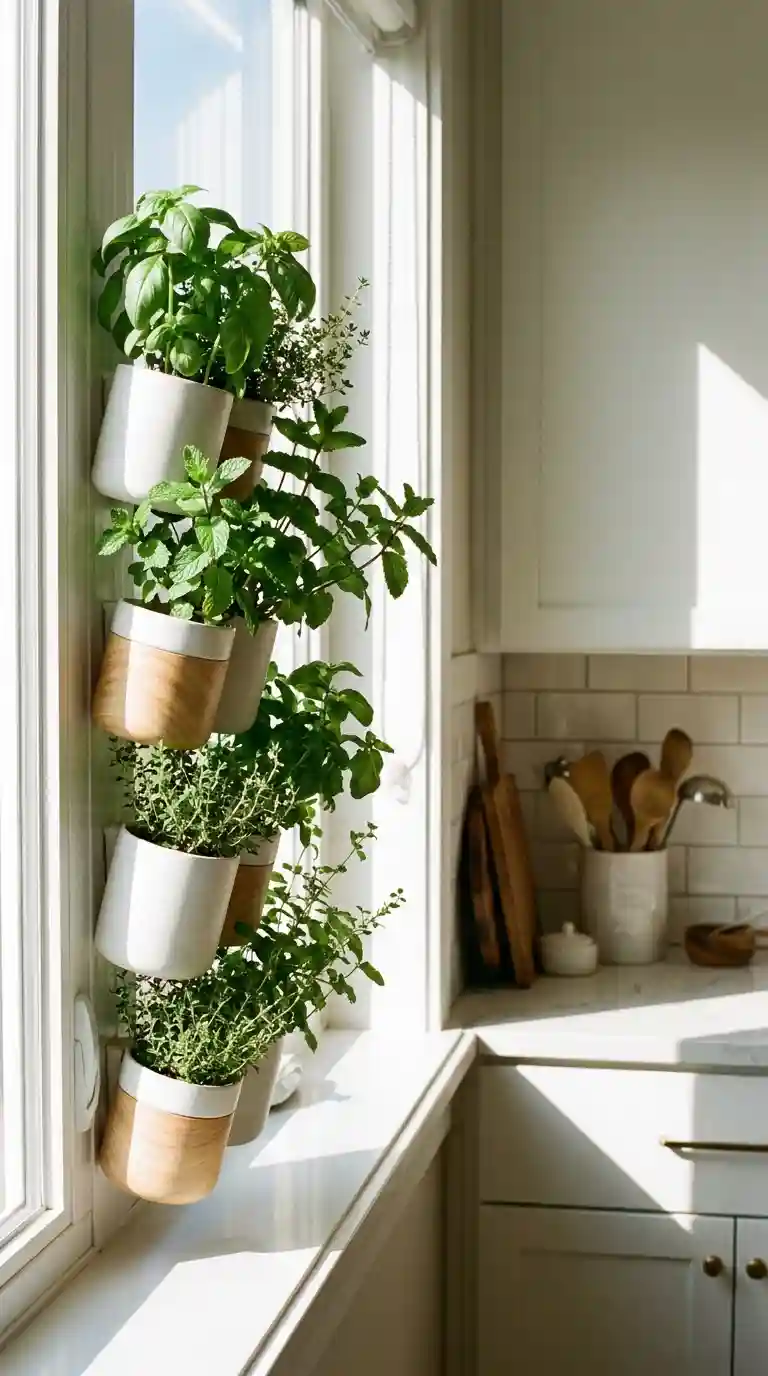
What Should You Grow for the Kitchen?
For everyday cooking, herbs beat ornamentals. Basil, mint, chives and parsley all cope with shallow containers, while rosemary and thyme need sharper drainage and less frequent watering — so group plants by water need, not by appearance. A row of small pots near a kitchen window, as in the photo above, keeps snipping within arm’s reach and stops herbs being forgotten at the back of a garden.
Vegetables need a stronger decision. Tower planters suit lettuce, strawberries and herbs because their roots stay shallow, while cucumbers, pole beans and peas need a trellis and at least four to six hours of direct sun. Tomatoes can work in a cage or stake, but choose a compact variety for a balcony pot rather than an indeterminate vine that will outgrow its support by midsummer.
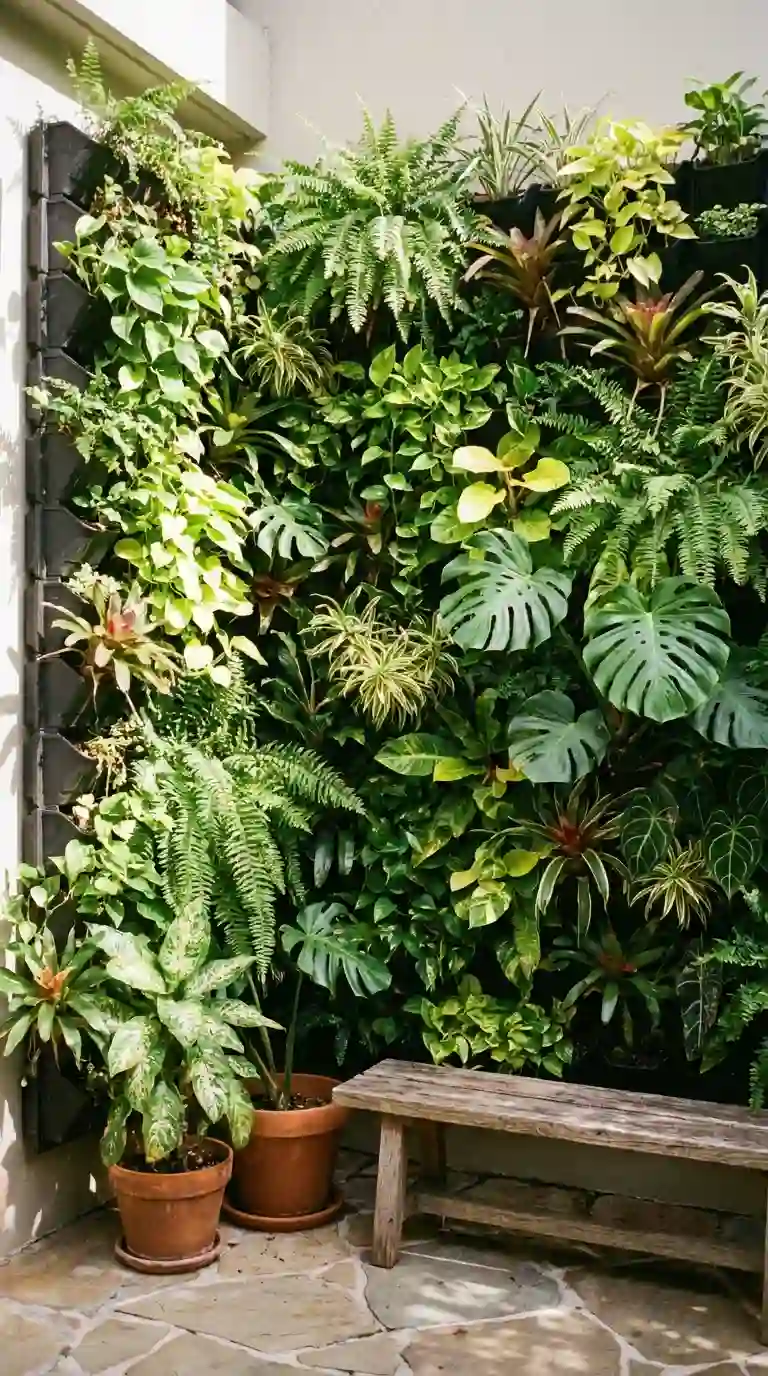
Is a Living Wall Worth the Extra Effort?
A living wall earns its place when you want dense, year-round greenery rather than a few pots. Modular panels give even watering and a tidy grid, while felt pockets are cheaper, lighter and easier to trim to an awkward wall size. Preserved moss is the exception: it needs no water or light, but it is decoration, not a garden, so do not count it among plants that will grow or purify the air.
Mix leaf shapes deliberately, as in the photo above: one broad leaf, one fine fern-like texture and one trailing plant, repeated across the wall. That repetition is what stops a living wall looking random, in the same way that a calm room balances bold colour with quiet neutrals — see how an earthy living room balances bold colour for the same principle indoors.
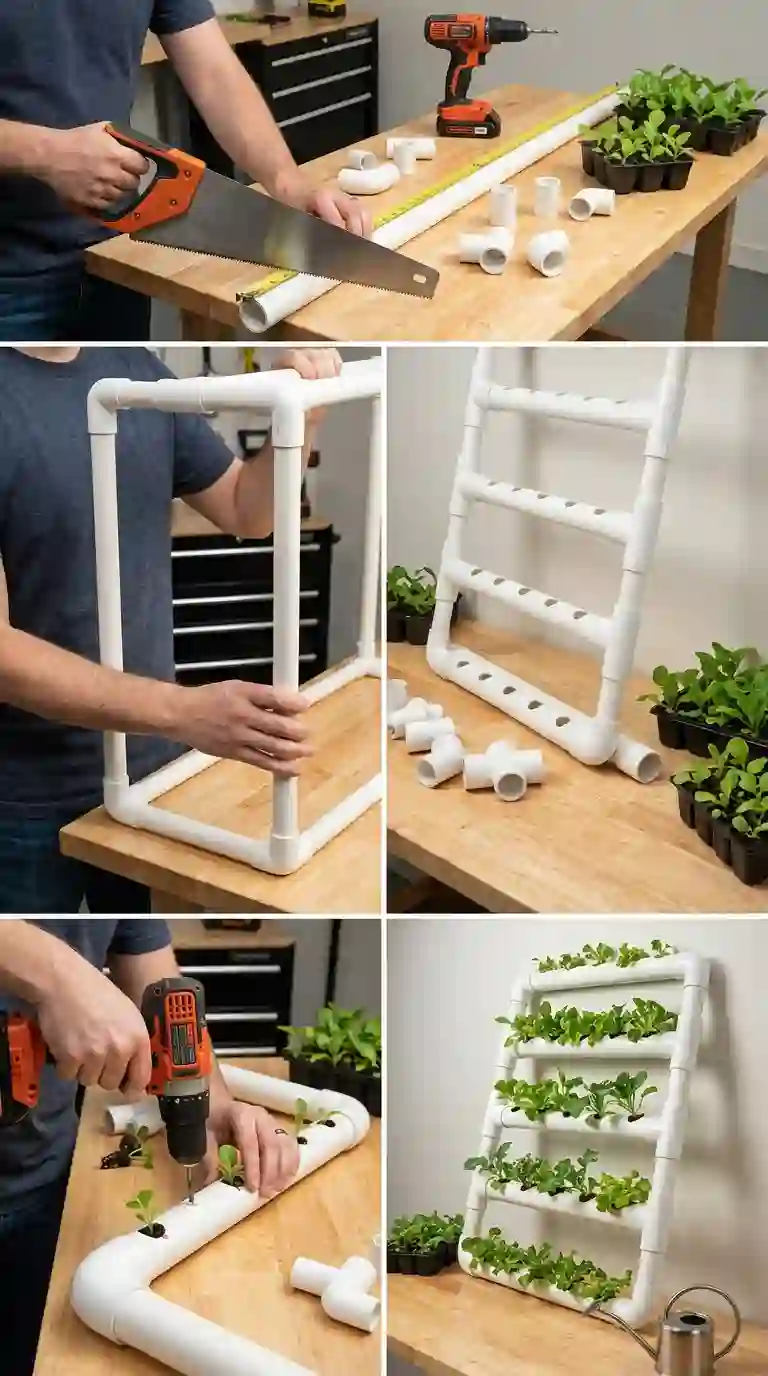
What Can You Build in a Weekend?
Three builds genuinely fit a weekend. First, a hanging pocket planter: hang it, fill each pocket with light compost, and plant small herbs or lettuce. Second, a crate wall: fix two or three crates in a staggered pattern, line them with landscape fabric, and plant one crop per crate. Third, a PVC pipe planter: cut wide pipe into sections, seal one end of each, drill drainage holes, and mount them at staggered angles on a backing board.
Watering is where weekend builds usually fail. Water from the top reaches the upper pockets first, so check the lowest row separately and water it directly. A narrow-spout watering can helps, and a simple drip line along the top, run for 10–15 minutes, is worth adding once a wall has more than about 12 pockets. Feed with diluted liquid fertiliser every two to three weeks in the growing season, because small pockets run out of nutrients faster than a ground bed.
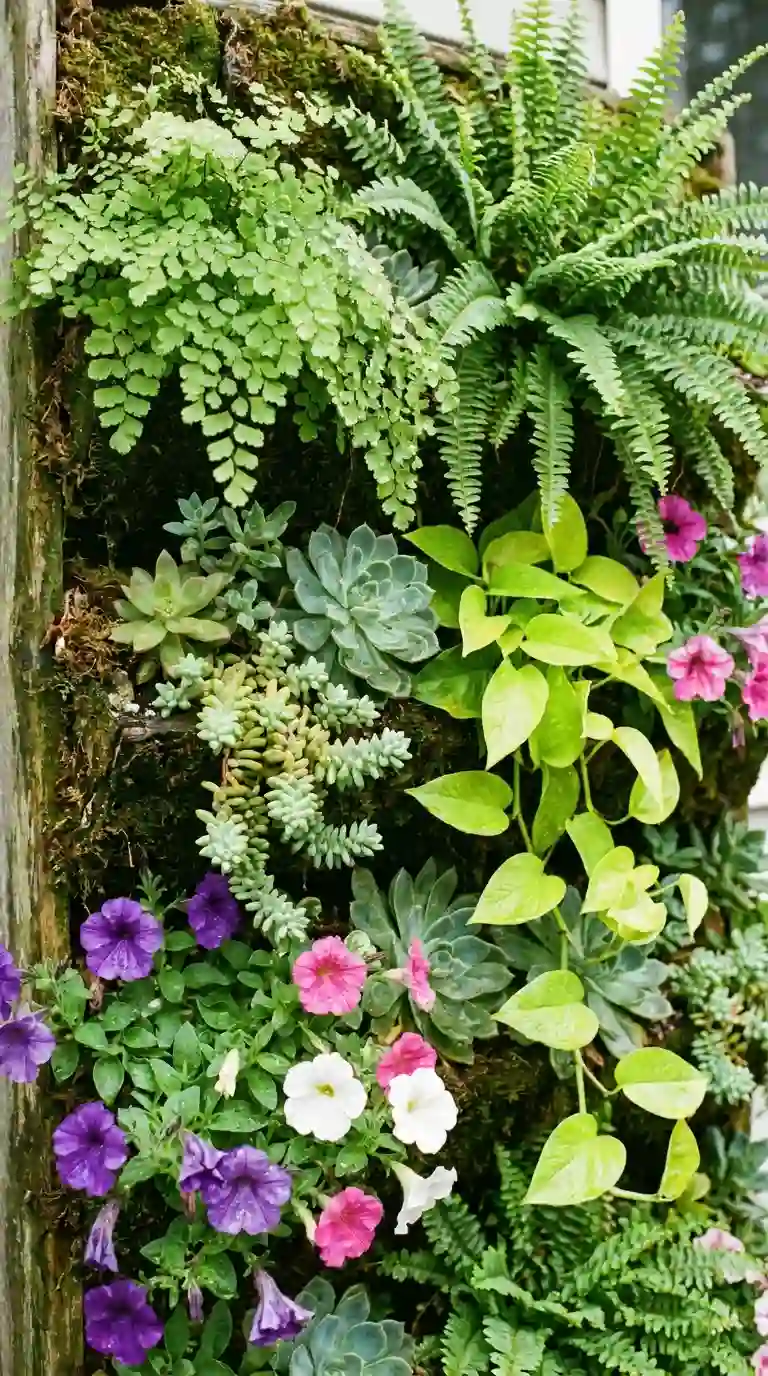
How Do You Keep It Alive Through the Seasons?
Match plants to light first, and everything else gets easier. For full sun, choose succulents, petunias, marigolds and most herbs; for shade, choose ferns, pothos, philodendron and ivy, as shown in the dense wall in the photo above. If watering is often forgotten, lean on snake plants, pothos and succulents, which cope with irregular watering far better than flowering plants. Check soil with a finger before watering: yellow, mushy leaves usually mean too much water, while dry, crisp edges mean too little.
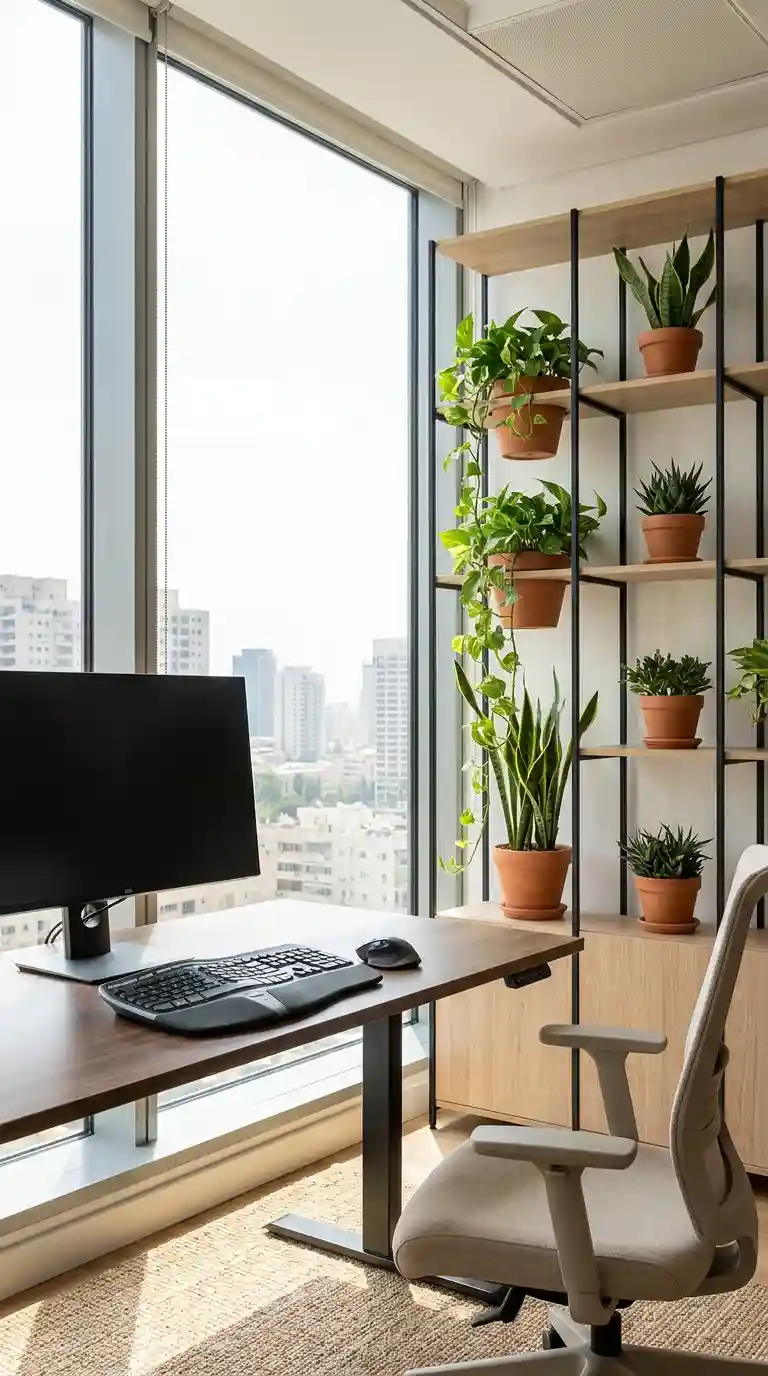
The same rules work in a workspace, where light is often inconsistent. A small tiered shelf against an office wall, planted with pothos and snake plants, adds greenery without taking desk space, as in the office photo above. Keep the planting light: heavy pots on cubicle clips will sag, and a modest panel behind a desk makes a stronger impression than a wall crammed with struggling plants.
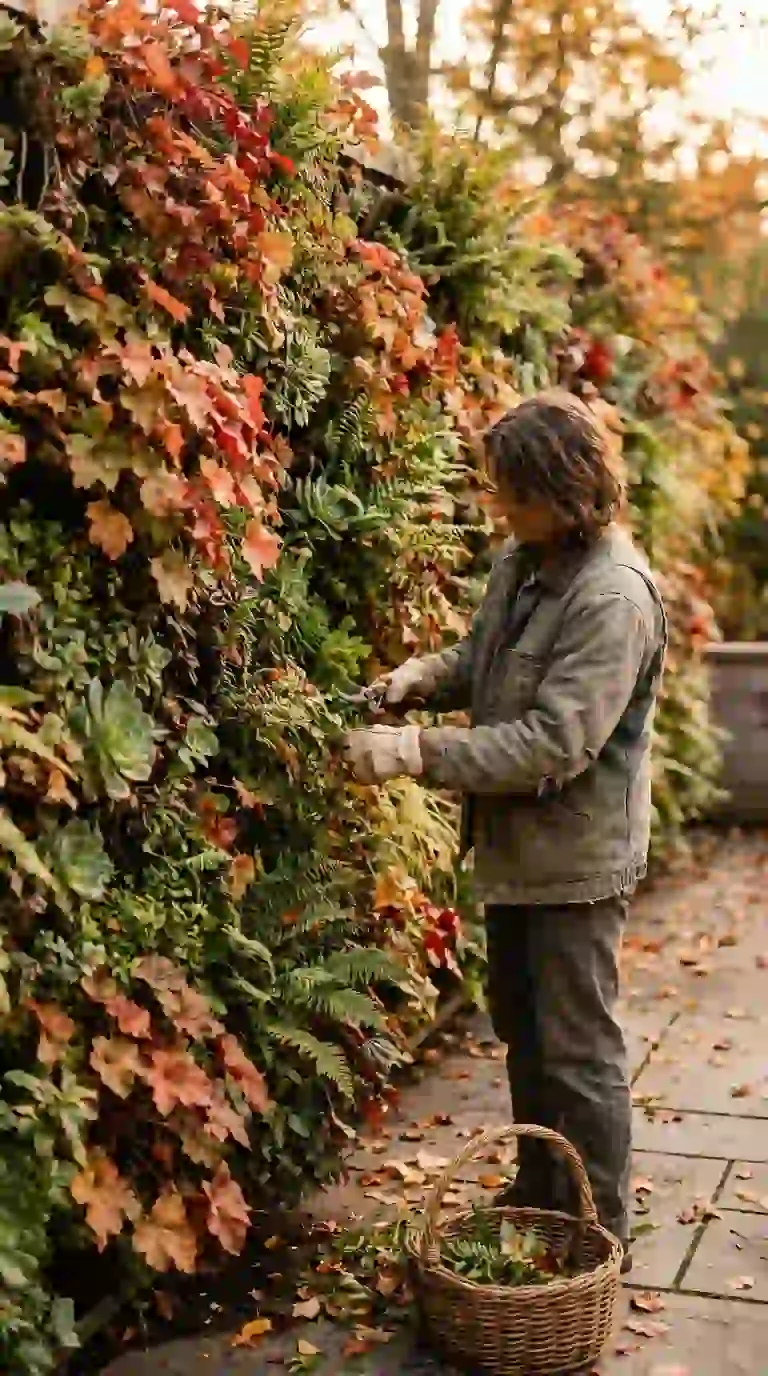
Seasonal care is mostly small, regular jobs. In spring, refresh the top layer of compost and check every fixing after winter weather; in summer, water more often, especially on sun-facing walls that radiate extra heat. In autumn, trim leggy growth and move tender plants indoors, and in winter, cut watering back sharply for plants that have stopped growing. A quick check every two or three days, rather than a monthly overhaul, is what keeps a wall looking tended, as in the seasonal care photo above.
Frequently Asked Questions
What is the easiest way to start?
Start with a hanging pocket planter or a leaning ladder shelf. Both need no drilling, cost little, and let you learn how much light and water your spot actually gets before you commit to a larger wall.
How much should a first wall cost?
A small first wall usually costs £60–£180, including plants and compost. A larger felt or modular living wall more often costs £400–£1,200, so start small and expand only once the first section is thriving.
Can you build one without drilling?
Yes. Freestanding shelving, leaning ladders, tension systems and railing planters all work without drilling, which makes them the sensible choice for rented homes and plasterboard walls.
How often should you water it?
Most small walls need checking every two to three days, but always test the soil first. Upper pockets dry faster than lower ones, so water the bottom row directly rather than assuming water from the top has reached it.
What soil should you use?
Use a lightweight potting mix with perlite or coco coir. Heavy garden soil compacts in small pockets, holds too much water and can quickly suffocate roots.




3 Comments on “Walls That Grow: Planting Upwards Without the Mess”